Scratchbuilt Quadrotor

Toymaker

Crashologist
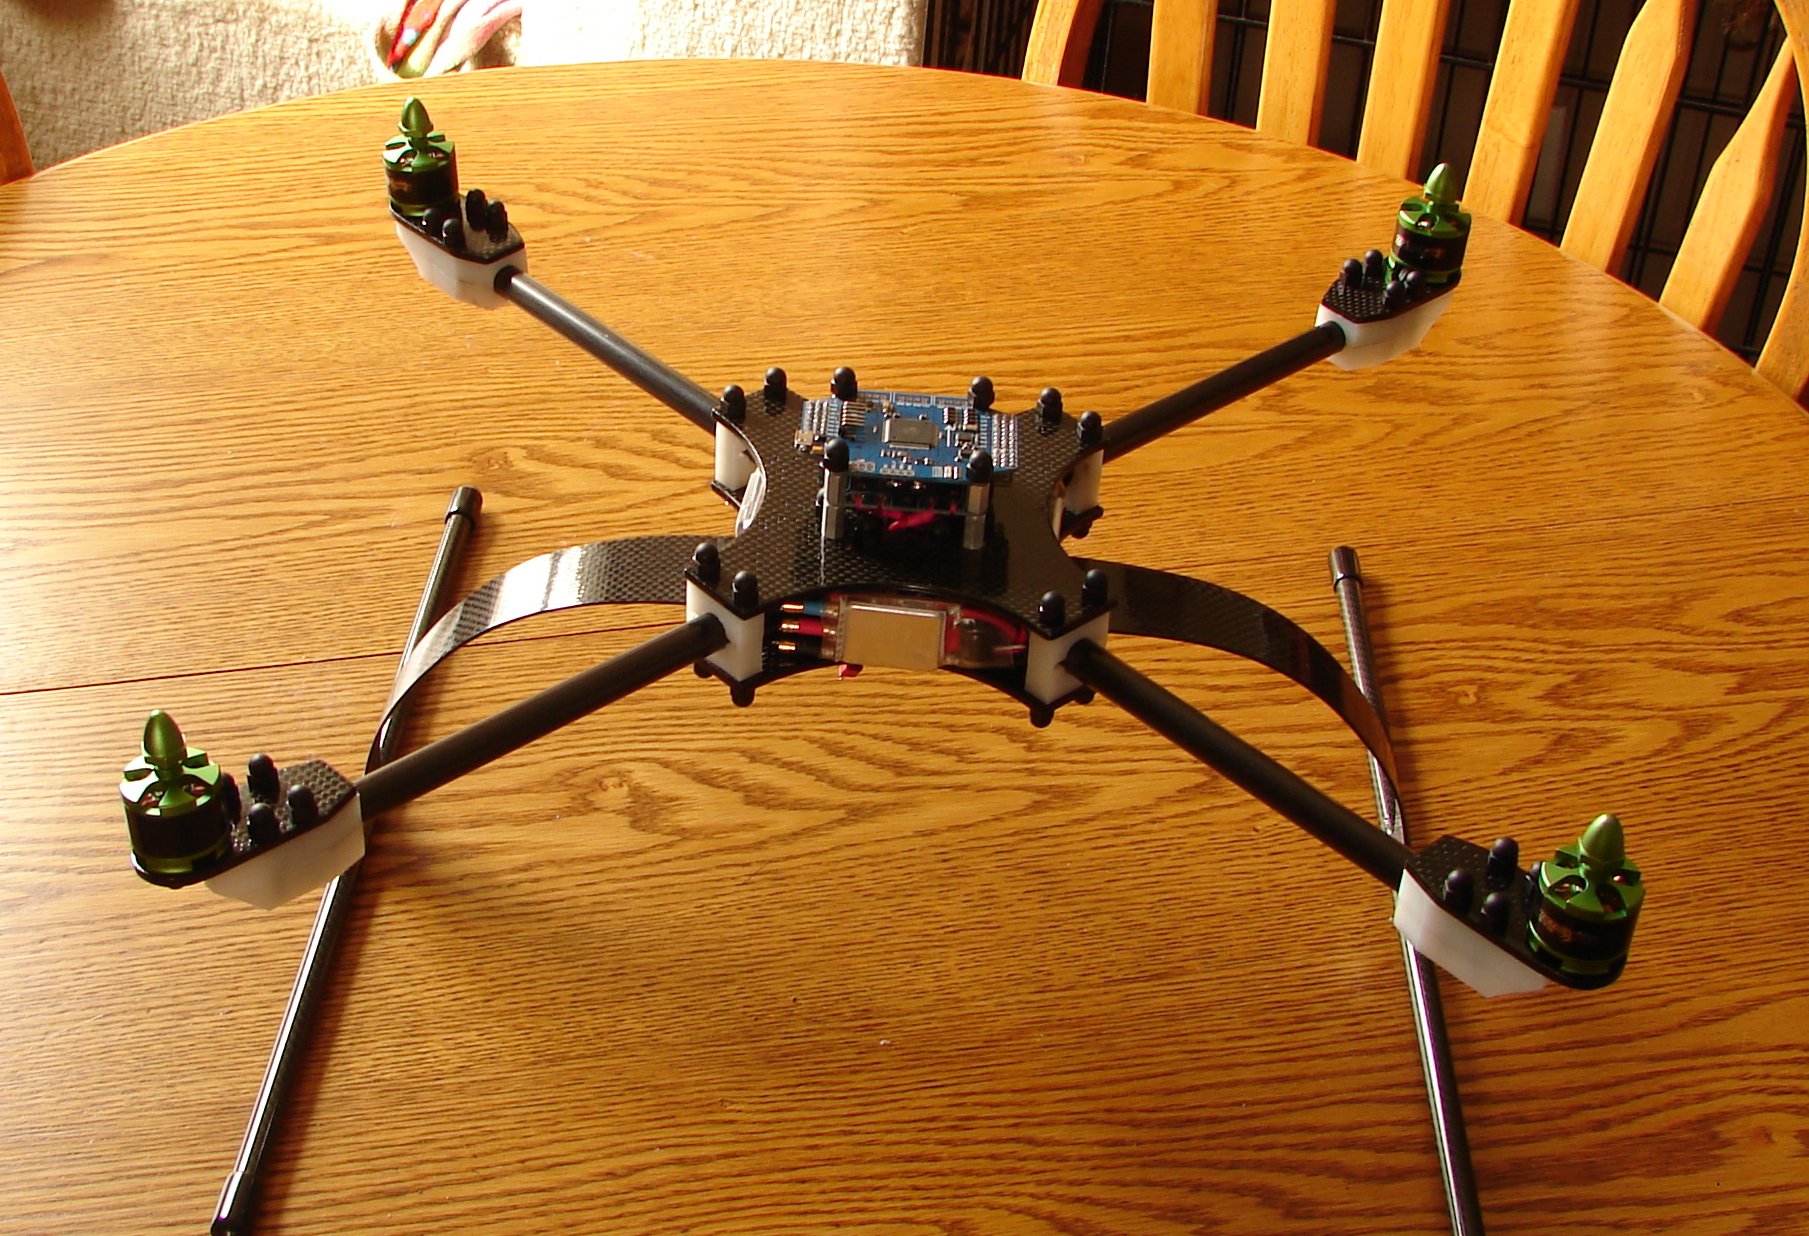
The carbon fiber is relatively easy to work with. I used medium speed thin viscosity epoxy and PVA mold release from US compostes in Florida. The Carbon can be purchased from a lot of different places. I got mine as remnants on EBay. You'll also need rubber gloves, cheap brushes, and mold materials. For a flat plate I use transparent styrene sheet from Home Depot it's sold with the replacement glass in a separate bin. it's slightly frosted one side and shiny on the other. I tape this sheet down to a piece of particle board on the edges (I cover the boards in masking tape). Then I wax it with car wax and spray it with 2 coats of PVA mold release (1 hour in between coats). After the PVA dries (3hours) I cut the CF fabric into the right sizes. I seem to be getting about .010" thickness for every layer of CF I used 5 oz fabric. The next step is to mix up the epoxy very well by this I mean accurately and thoroughly. Then brush it onto the surface of the bottom mold piece. Take the first piece of CF and lay it onto the mold pressing it down with your fingers so the epoxy saturates the fibers. I do this until the epoxy is visible everywhere on the fabric. Then I brush on more epoxy and repeat this process until all the layers are saturated. Then I brush epoxy on the top mold piece and lay it down carefully trying to keep bubbles out. once that is down I take teh top board and clamp it carefully and evenly with many clamps. I don't tighten it enough to deform the board just enough to squeeze the whole "mess" firmly. By now you have quite the mess going on. Newspaper bed underneath this is a good idea. I have also used a garbage can with a bag to catch the drippings. If the temperature is between 50-60 you'll have to wait a couple days for everything to cure. You can help things along by warming it up. I use a floodlight and a 130 watt bulb to keep the mold warm. If you do this then 12 hours is enough. feel the "Drippings" to see how the epoxy is setting. If it's sticky at all leave it alone. Once the epoxy is set you can unclamp the molds and remove the plate that you just made. I cover it with masking tape to prevent scratches then cut it to shape with a band saw with a fine blade. It actually cuts very nicely but you don't want to breathe any dust. Please wear a respirator.


Toymaker

Crashologist
ARGH........The waiting is killing me!!!!! All my stuff is in the USA! My 9XR, module and receiver from HK have made it to Jamaica NY!
My Controller, ESC's, etc. from Witespy are in transit also. The shipping from Florida is slow as molasses right now! I would have expected a couple days but it's been 6 if you count the weekend. Plus the Witespy backlog time! Is it here yet? Is it here yet? Is it here yet? Is it here yet? Is it here yet? Is it here yet? :)


Toymaker

Crashologist
Well I got some of my electronics in and I got really busy at work. Wouldn't you know it?! So I wasn't able to get much done at all during the week. However Saturday and today were quite productive!
I started by soldering my power distribution board first. I decided to angle them and point them in towards the center of the frame to keep the wiring more or less invisible.
Pwr_Dist_Brd.JPG
 

Toymaker

Crashologist
I also soldered connectors to the controls board. I also aligned these toward the center as well.
Cntrlr_Top.JPG
Cntrlr_Top.JPG
 
Last edited by a moderator:

Toymaker

Crashologist
Here is the bottom of the controller the connectors for the ESC's fit in perfectly. Not a very good picture sorry.....

Ctrlr_Bottom.JPG
 
Last edited by a moderator:

Toymaker

Crashologist
I bought naked ESC so I could solder the connectors and wires the way I wanted. The way I'm mounting them is going to work out nicely. I soldered the connectors directly to the solder pads. then I shrink tubed them in red blue and black. I used 16 Awg silicon wire for the power input. I also added some Corrugated plastic between the heat sink and the female terminals so that there was a gap and the heatsink wouldn't slide into them shorting them into one another. Later if i find that the ESC's run warm I may replace the plate heatsink with a finned one. it should be easy by just cutting the shrinkwrap and attaching the finned one.
ESCs.JPG
 
Last edited by a moderator:

Toymaker

Crashologist
I also added about 9" of wire to the motor leads. I also put male 3.5mm connectors on the ends. I will add shrink tube in the correct color to match the ESC's after I determine rotation. I ran these through the motor support tubes to keep the wiring nice and clean. Out of sight out of mind....
Motors_W_Extensions.JPG
 

Toymaker

Crashologist
This is the bottom of the power distribution board with the wires for the ESC's connected. I plan on ditching the aluminum standoffs and replace them with black nylon standoffs to save a little bit of weight and to match all the acorn nuts.

Bot_Pwr_Dist.JPG
 
Last edited by a moderator:

Toymaker

Crashologist
This is the bottom of the controller board with the ESC cables attached. I don't have my receiver yet otherwise those would be connected as well.
Ctrlr_Bottom_W_Esc.JPG
 

Toymaker

Crashologist
The ESC's mount vertically in the frame. I still need to drill holes to allow the zip ties to hold them in place. There is nice airflow over the heat sinks although they are wrapped in heat shrink. Does anyone cut the heat shrink to allow the air to directly cool the ESC's? I'll try it like this first and see what happens. It'll be really easy to cut out the heat shrink or add finned heat sinks later if heat is a problem. The connectors on the ends of the motor leads will also have heat shrink on them after I determine the color needed. This will match the ESC after I determine rotation.
ESC_in_Frame.JPG
 

Motopreserve

Drone Enthusiast
Looking absolutely awesome. I hadn't thought about soldering female connectors onto a PDB. I recognize the benefit, but does it have enough contact to feel safe on that angle??? I have the same board - but just soldered right to it.

Keep up the great work!
 

Toymaker

Crashologist
Here's a picture of the whole Quad. with the ESC's and wiring all in it's correct location. It should be nice and clean looking when complete. I still have to add the receiver, battery warning board, LED's, and LED control board.

Quad_W_Electronics.JPG
 

jbrumberg

Member
Great work going on here. Black nylon standoffs is definitely a better way to go and it will look better with your setup. Awesome.:)
 

Toymaker

Crashologist
Looking absolutely awesome. I hadn't thought about soldering female connectors onto a PDB. I recognize the benefit, but does it have enough contact to feel safe on that angle??? I have the same board - but just soldered right to it.

Keep up the great work!

I was thinking the same thing about the surface contact at an angle. The connectors bought had that angle machined into them, so I went with it. I can push pretty hard on them. I'm actually afraid of pulling the solder pad off of the board instead of breaking the solder joint. I had also thought of using some solid 12 awg copper wire bent to help with strength. I couldn't find any here at the house. If I do have a problem I'll put the wire reinforcements in so the solder connection will end up being on both sides of the board.
 

Top