Build Log - Oktokopter (MK, AD8 HL)

ZeHd

Member
Hi everyone, my name is Jose Luis, I´m from Vinhedo, it is a small town 100km from the São Paulo capital of Brazil. I´ll be logging my first MK build. I decide to buy the AD8 HL to hang my canon 5D mark II on it. I have not much experience with multirotors or RC in general.
I start with kkmulticopter which I crash and destroy two, one of than literally I lost in the woods, the good thing is that I have learn a lot with it. Second experience is with the hoverfly pro which I think have a greet future but now they need sometime to get rid of some bugs like weird flips and stability regard altitude hold. I´ll continue tests and fly with HFpro but my main focus now will be the building process of Oktokopter from MK.

Here is the list of my build:
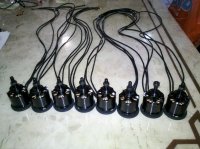
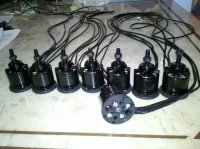
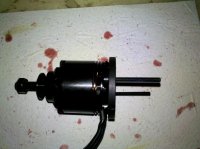
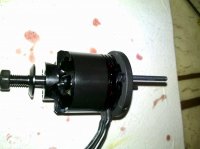
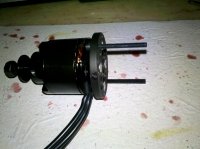
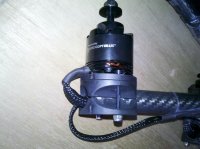
Motor Choice: QuadroPower Motor QC-3328 - update 11/23/2011
TX: (Futaba T10CAG) changed to Graupner MX-20 - update 11/23/2011
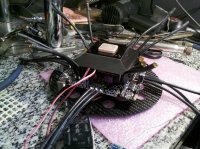
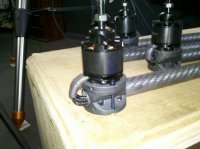
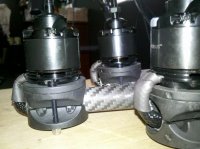
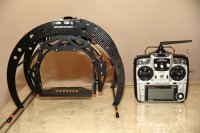
Frame: Droidworx AD8 HL
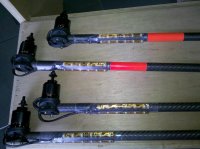
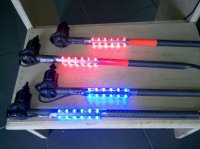
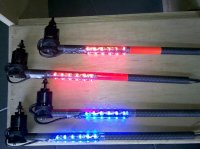
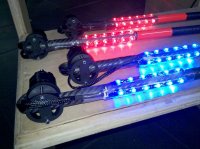
Landing Gear: Droidworx Landing gear extended
Gimbal: Photohigher Pro mount-200
FPV Cam: High Resolution Plug & Play Box Camera NTSC
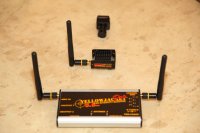
FPV TX: Mondo Stinger 5.8GHz 500MW AVD Transmitter
FPV RX: YellowJacket 5.8 Pro Diversity Receiver
Goggles: Vuzix Wrap 920
Antenna: 5.8GHz 8dBi Single Band Gooseneck Vitenna
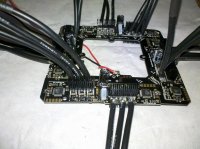
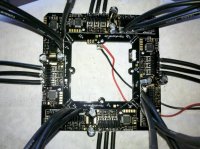
Extension: Extension-PCB Set
Wireless: ZigXbee Pro 900 USB
Wireless: Ziggy's Follow Me Kit 900Mhz
Telemetry: (2.4GHz Jeti Box mini, 2.4 GHz Satellite RX Jeti Duplex RMK2, Duplex TU2 2.4GHz) changed to Graupner GR-24 2.4Ghz - update 11/23/2011

Until now I just received the landing gear, RX/TX and cam for FPV, the frame and mk components are on its way.
I´ll be posting photos and comments of this build process. Any comments are very welcome, thanks and good fly to everyone!

Jose Luis

View attachment 1574
 

Attachments

  • IMG_5494.jpg
    IMG_5494.jpg
    138.2 KB · Views: 370
  • IMG_5495.jpg
    IMG_5495.jpg
    122 KB · Views: 396
  • IMG_5531.jpg
    IMG_5531.jpg
    45 KB · Views: 339
Last edited by a moderator:

ZeHd

Member
Today I placed an order for the motors, propellers etc.
Motos: QC3328
Propellers: APC SF 12x3.8 and Aerobot 12x3.8 Carbon Fiber Propeller.
Cooler: Aluminum ESC Cooler for MK
GPS Shield: GPS_SHIELD_11
 

ZeHd

Member
I received the Droidworx AD8 HL and for my surprise it is V3 which have some improvements. I can wait to receive the motors and start build the frame and see the real size of it.
I have been reading a lot about jeti telemetry but I not 100% sure if the Duplex TU2 2.4GHz will fit in the futaba T10CAG. Also I don´t know if I´ll have all 10 channels available or only 8ch.
 

ZeHd

Member
Finally after log wait for my orders get clearance from Brazilian customs I have everything I need to start my build process.

Today I made 24 short cable with bullet connectors for all eight BL. My first impression was that the cable 12AWG is too large/big for it but I did not have any other so I keep it.
View attachment 1562View attachment 1563
After the solder I check one by one to make sure there is no bad solder or connection.
View attachment 1564View attachment 1565
Next step is make the solder of the GPS Shield.
 

Attachments

  • 2011-11-22_13-24-04_556.jpg
    2011-11-22_13-24-04_556.jpg
    153.4 KB · Views: 256
  • 2011-11-22_13-40-41_212.jpg
    2011-11-22_13-40-41_212.jpg
    155.4 KB · Views: 237
  • 2011-11-22_13-40-56_408.jpg
    2011-11-22_13-40-56_408.jpg
    145.3 KB · Views: 307
  • 2011-11-22_13-41-20_10.jpg
    2011-11-22_13-41-20_10.jpg
    152.7 KB · Views: 403
  • 2011-11-22_13-52-56_282.jpg
    2011-11-22_13-52-56_282.jpg
    147.2 KB · Views: 323

ZeHd

Member
GPS Shield

Everything comes easy and clean. Done!
View attachment 1567View attachment 1568
My goal for tomorrow is finish the two lights for the back arms and than start install the brushless in the arms.

Regards

Jose Luis
 

Attachments

  • 2011-11-22_14-16-06_724.jpg
    2011-11-22_14-16-06_724.jpg
    150.2 KB · Views: 363
  • 2011-11-22_14-16-36_875.jpg
    2011-11-22_14-16-36_875.jpg
    151.4 KB · Views: 388

ZeHd

Member

Attachments

  • 2011-11-23_08-34-43_543.jpg
    2011-11-23_08-34-43_543.jpg
    141.1 KB · Views: 298
  • 2011-11-23_08-35-14_398.jpg
    2011-11-23_08-35-14_398.jpg
    140.9 KB · Views: 332
Last edited by a moderator:

ZeHd

Member
I was reading the DW instructions how to assemble the engine mount and I realize that there is no room to install the bolts to hold the engine on the boom after fix the brushless into the engine mount disks. So it was necessary take all four bolts from the brushless and install the two big bolts before install the engine mount disk.
View attachment 1571View attachment 1572View attachment 1573
 

Attachments

  • 2011-11-23_09-37-29_187.jpg
    2011-11-23_09-37-29_187.jpg
    139.5 KB · Views: 341
  • 2011-11-23_09-37-41_848.jpg
    2011-11-23_09-37-41_848.jpg
    127.2 KB · Views: 354
  • 2011-11-23_09-38-10_461.jpg
    2011-11-23_09-38-10_461.jpg
    139.4 KB · Views: 329


ZeHd

Member
Yes you are right, it is hard to stick on that surface. What I found is the Turnigy Heat Shrink Tube 25mm Transparent on HK store and this heat shrink is a clean and good solution also to protect those LED´s.

here is the link
http://www.hobbyking.com/hobbyking/store/uh_viewItem.asp?idProduct=13839

Regards,
Jose Luis

How are you getting those LED's to stkc on that curved surface...I am facing the same problems. I see you have found some clear plastic to go over the top, can you enlighten me where you got this from?

Ross
 

ZeHD one of your motor mounts seems to not be inserted correctly in the boom. On the pictures posted, the second one with the blue leds. Make sure that the top mount dimple is inserted into the booms hole.
 

gadgetkeith

likes gadgets
hi there ZeHD

one of your pics showing motors on booms did i happen to see a celestron tripod in the back of pic

just curious

thanks keith


ZeHd

Member
Good eyes redridinghood, thanks for warning me. I mounted the boom reversed like the two holes on the engine side.

Regards,
Jose Luis
ZeHD one of your motor mounts seems to not be inserted correctly in the boom. On the pictures posted, the second one with the blue leds. Make sure that the top mount dimple is inserted into the booms hole.
 

ZeHd

Member
Hi gadgetkeith,

Yes you are right it is celestron CGE Pro tripod, on top of it there is a 200mm Newtonian telescope. There is my shack and also my astronomical observatory.

Regards,
Jose Luis
 

Droider

Drone Enthusiast
@ZeHd

Nice looking build there.. just wondering why you put bullets on the BL's rather than solder motor wires direct to BL's..

Its nice to think you can just change a motor by unplugging BUT its a week link

Dave

PS from own experience!
 

ZeHd

Member
Thanks Dave for the advise, yes I know what you mean specially when we are talking about lots of vibrations. Maybe I´ll change after identified the engine wire positions.

Regards,
Jose Luis
@ZeHd

Nice looking build there.. just wondering why you put bullets on the BL's rather than solder motor wires direct to BL's..

Its nice to think you can just change a motor by unplugging BUT its a week link

Dave

PS from own experience!
 

ZeHd

Member
Today was not a productive day, I just have fixed the boom with the blue LED that was wrong mounted, thanks to redridinghood. I had to flip the LED to the other side of the boom. Also I have run some brushless tests to see if they are working fine before install than into the center plate and for my surprise I found two with a strong vibrations and later I found to be the bend propeller mount.
I´m thinking in some connectors for the LED wires right now and how to connect than to the extencion-PCB. I would like to control the RED and BLUE light like visual cue for low battery and GPS/hold position.

Regards,
Jose Luis
 
Last edited by a moderator:

ZeHd

Member
Today I install the Aluminum ESC Cooler for all BLs, my questions is how good is to have it?
From all build log´s that I have found seems not everyone are using coolers, it is bad choice?
I decide go for it, the BLs will be happy with that I guess.

View attachment 1597View attachment 1598View attachment 1599

Regards,

Jose Luis
 

Attachments

  • 2011-11-25_10-05-37_168.jpg
    2011-11-25_10-05-37_168.jpg
    144.5 KB · Views: 317
  • 2011-11-25_10-05-58_710.jpg
    2011-11-25_10-05-58_710.jpg
    130.8 KB · Views: 320
  • 2011-11-25_10-06-17_609.jpg
    2011-11-25_10-06-17_609.jpg
    150.2 KB · Views: 258

Top