Bartman
Welcome to MultiRotorForums.com!!
After a month of waiting (sorry!) it's time to kick off our official review of the 3D Robotics Iris+ ready-to-fly (RTF) quad copter.
The backstory: 3D Robotics has been supporting the Arducopter Mega project for a number of years now and through their leadership in the area of firmware development they have been able to get the process more organized and stable. With that the APM flight control board (with the ArduCopter firmware) began to gain in popularity and it wasn't long before the APM was superceded by the PX4 controller and then the Pixhawk.
With their flagship flight control system firmly on its way to market acceptance 3D Robotics set out to develop a RTF quadcopter that could serve as both a reliable camera platform for aspiring aerial mediaists (I thought I just invented a word but, alas, google tells me not today! ) and a fun, feature filled RTF quad for ambitious hobbyists.
Like many other entrants to the RTF quad market, the Iris had its share of teething pains but the Iris+, and the Pixhawk flight control system in general, have been enjoying an ever expanding and very enthusiastic/happy user community.
So here is our review. It will be posted in parts in order to get it going and with the weather here in New Jersey, USA improving by the day I'm hoping to get the formal review done quickly and to continue flying the Iris+ and learning the ins and outs of the Pixhawk flight control system and the features available for Iris+ flyers.
Along with this brief introduction we're posting photos this evening from the unboxing and initial inspection. Since we've declared MultiRotorForums.com to be a "No Unboxing Videos!" zone we'll instead be posting our "First Impressions" video sometime tomorrow evening.
After that we'll fly it using nothing more than the user guide and other instructions just as any other new user would. After all, we'd like to know if RTF means RTF and if there are any problems we'd like to know if a new
user will be able to get them sorted out.
Once we're flying we'll post another video update demonstrating our first flights and with commentary about our experience to that point. Lastly we'll wrap it up with our conclusions and strategies to help new users get their Iris+ quads flying successfully.
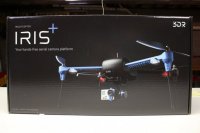
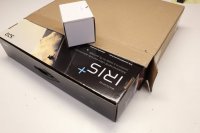
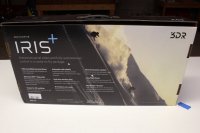
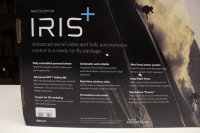
To the photos! First we present for your review, the Iris+ as it arrives safely double boxed with the optional gimbal packed separately.
View attachment 23945 View attachment 23947 View attachment 23948 View attachment 23949
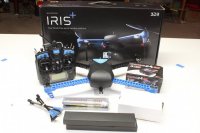
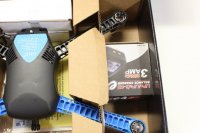
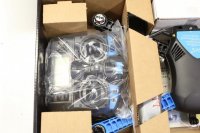
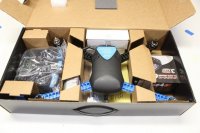
Opening the box you'll find everything well organized, secure, and packed for a safe trip to your home.
View attachment 23946 View attachment 23944 View attachment 23942 View attachment 23943
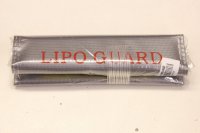
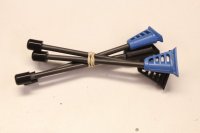
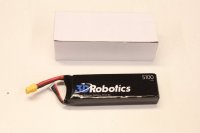
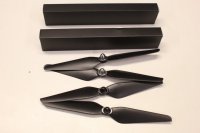
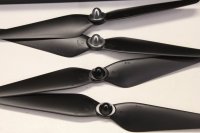
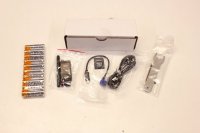
Unpacking the box we find the assembled Iris+, the RC transmitter, extended landing gear legs, various boxes with props, parts, tools, a battery, a LiPo safe bag for charging, and a charger.
View attachment 23940 View attachment 23941 View attachment 23939 View attachment 23938 View attachment 23937 View attachment 23936 View attachment 23935
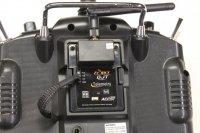
I love it when the RC transmitter's switches are labeled custom for the application.
View attachment 23925 View attachment 23921 View attachment 23920
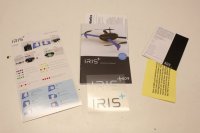
Also included in the box are an instruction manual, an addendum slip which addresses firmware updates, a registration card, STICKERS!!!, and a companion field guide (a quick reference guide, if you will) to take with you when you're going flying.
View attachment 23918 View attachment 23922
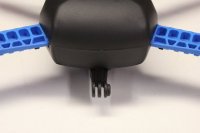
Exterior photos;
View attachment 23932 View attachment 23933 View attachment 23934 View attachment 23931 View attachment 23930 View attachment 23929 View attachment 23928 View attachment 23927 View attachment 23926 View attachment 23924 View attachment 23923 View attachment 23911
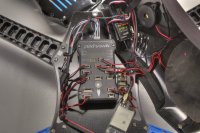
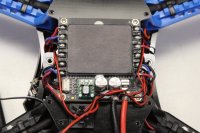
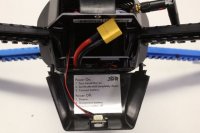
Interior photos starting with the Pixhawk flight control system. In this photo you can also see the RC receiver, the beeper, the telemetry transmitter, and underneath the padded circle on the right (on the underside of the top shell) is the GPS receiver.
View attachment 23912
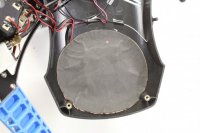
Another pic of the padding that covers the GPS antenna
View attachment 23913
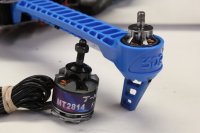
Another shot of the top shell opened up. The frame uses two plates with the arms bolted from above and below.
View attachment 23914 View attachment 23915View attachment 23910
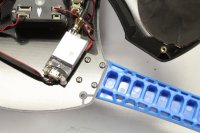
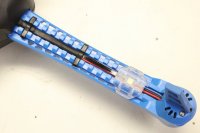
Located below the lower frame plate, one component contains all of the hardware for the brushless motor speed controllers. The motor wires are soldered directly to it using adequately sized pads that are accessible without any additional disassembly.
View attachment 23916 View attachment 23917
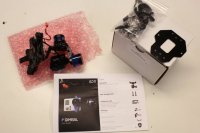
And one last photo of our Tarot 2D gimbal removed from the box and awaiting installation. Note the custom 3DR instructions set, another nice touch.
View attachment 23919
Thanks for taking a look at our introduction to the 3D Robotics Iris+ RTF quadcopter. I'll be preparing the "First Impressions" video in the morning and expect to have it posted about this time tomorrow evening. Please feel free to post your questions here or in the Official 3DR Iris+ Owners' Thread.
Thanks!
The backstory: 3D Robotics has been supporting the Arducopter Mega project for a number of years now and through their leadership in the area of firmware development they have been able to get the process more organized and stable. With that the APM flight control board (with the ArduCopter firmware) began to gain in popularity and it wasn't long before the APM was superceded by the PX4 controller and then the Pixhawk.
With their flagship flight control system firmly on its way to market acceptance 3D Robotics set out to develop a RTF quadcopter that could serve as both a reliable camera platform for aspiring aerial mediaists (I thought I just invented a word but, alas, google tells me not today! ) and a fun, feature filled RTF quad for ambitious hobbyists.
Like many other entrants to the RTF quad market, the Iris had its share of teething pains but the Iris+, and the Pixhawk flight control system in general, have been enjoying an ever expanding and very enthusiastic/happy user community.
So here is our review. It will be posted in parts in order to get it going and with the weather here in New Jersey, USA improving by the day I'm hoping to get the formal review done quickly and to continue flying the Iris+ and learning the ins and outs of the Pixhawk flight control system and the features available for Iris+ flyers.
Along with this brief introduction we're posting photos this evening from the unboxing and initial inspection. Since we've declared MultiRotorForums.com to be a "No Unboxing Videos!" zone we'll instead be posting our "First Impressions" video sometime tomorrow evening.
After that we'll fly it using nothing more than the user guide and other instructions just as any other new user would. After all, we'd like to know if RTF means RTF and if there are any problems we'd like to know if a new
user will be able to get them sorted out.
Once we're flying we'll post another video update demonstrating our first flights and with commentary about our experience to that point. Lastly we'll wrap it up with our conclusions and strategies to help new users get their Iris+ quads flying successfully.
To the photos! First we present for your review, the Iris+ as it arrives safely double boxed with the optional gimbal packed separately.
View attachment 23945 View attachment 23947 View attachment 23948 View attachment 23949
Opening the box you'll find everything well organized, secure, and packed for a safe trip to your home.
View attachment 23946 View attachment 23944 View attachment 23942 View attachment 23943
Unpacking the box we find the assembled Iris+, the RC transmitter, extended landing gear legs, various boxes with props, parts, tools, a battery, a LiPo safe bag for charging, and a charger.
View attachment 23940 View attachment 23941 View attachment 23939 View attachment 23938 View attachment 23937 View attachment 23936 View attachment 23935
I love it when the RC transmitter's switches are labeled custom for the application.
View attachment 23925 View attachment 23921 View attachment 23920
Also included in the box are an instruction manual, an addendum slip which addresses firmware updates, a registration card, STICKERS!!!, and a companion field guide (a quick reference guide, if you will) to take with you when you're going flying.
View attachment 23918 View attachment 23922
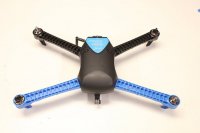
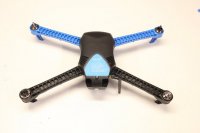
Exterior photos;
View attachment 23932 View attachment 23933 View attachment 23934 View attachment 23931 View attachment 23930 View attachment 23929 View attachment 23928 View attachment 23927 View attachment 23926 View attachment 23924 View attachment 23923 View attachment 23911
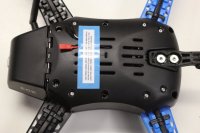
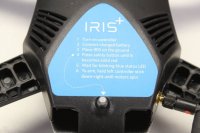
Interior photos starting with the Pixhawk flight control system. In this photo you can also see the RC receiver, the beeper, the telemetry transmitter, and underneath the padded circle on the right (on the underside of the top shell) is the GPS receiver.
View attachment 23912
Another pic of the padding that covers the GPS antenna
View attachment 23913
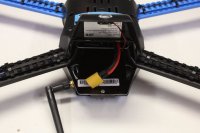
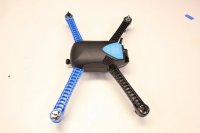
Another shot of the top shell opened up. The frame uses two plates with the arms bolted from above and below.
View attachment 23914 View attachment 23915View attachment 23910
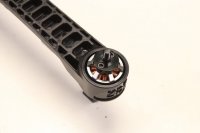
Located below the lower frame plate, one component contains all of the hardware for the brushless motor speed controllers. The motor wires are soldered directly to it using adequately sized pads that are accessible without any additional disassembly.
View attachment 23916 View attachment 23917
And one last photo of our Tarot 2D gimbal removed from the box and awaiting installation. Note the custom 3DR instructions set, another nice touch.
View attachment 23919
Thanks for taking a look at our introduction to the 3D Robotics Iris+ RTF quadcopter. I'll be preparing the "First Impressions" video in the morning and expect to have it posted about this time tomorrow evening. Please feel free to post your questions here or in the Official 3DR Iris+ Owners' Thread.
Thanks!
Attachments
-
 38-IMG_9620.JPG119.1 KB · Views: 763
 -
 39-IMG_9622.JPG66.5 KB · Views: 602
 -
 40-IMG_9614_HDR.JPG118.3 KB · Views: 696
 -
 35-IMG_9616.JPG87.6 KB · Views: 662
 -
 36-IMG_9618.JPG118.2 KB · Views: 690
 -
 37-IMG_9619.JPG102.2 KB · Views: 623
 -
 33-IMG_9611.JPG105 KB · Views: 655
 -
 34-IMG_9612.JPG108.9 KB · Views: 766
 -
 31-IMG_9608.JPG61.6 KB · Views: 931
 -
 32-IMG_9610.JPG71.4 KB · Views: 872
 -
 28-IMG_9602.JPG68.4 KB · Views: 715
 -
 29-IMG_9604.JPG118.5 KB · Views: 412
 -
 30-IMG_9605.JPG97.7 KB · Views: 607
 -
 25-IMG_9598.JPG68.6 KB · Views: 418
 -
 26-IMG_9599.JPG49.7 KB · Views: 386
 -
 27-IMG_9601.JPG70.9 KB · Views: 829
 -
 22-IMG_9593.JPG59.7 KB · Views: 430
 -
 23-IMG_9596.JPG80.9 KB · Views: 407
 -
 24-IMG_9597.JPG67.8 KB · Views: 421
 -
 19-IMG_9590.JPG40 KB · Views: 406
 -
 20-IMG_9591.JPG42.2 KB · Views: 390
 -
 21-IMG_9592.JPG39.7 KB · Views: 433
 -
 16-IMG_9587.JPG45.9 KB · Views: 486
 -
 17-IMG_9588.JPG45.4 KB · Views: 660
 -
 18-IMG_9589.JPG78 KB · Views: 720
 -
 14-IMG_9584.JPG73.9 KB · Views: 355
 -
 15-IMG_9585.JPG56.5 KB · Views: 398
 -
 11-IMG_9581.JPG40 KB · Views: 754
 -
 12-IMG_9582.JPG49.2 KB · Views: 387
 -
 13-IMG_9583.JPG66.9 KB · Views: 427
 -
 09-IMG_9579.JPG76.5 KB · Views: 486
 -
 10-IMG_9580.JPG56.4 KB · Views: 398
 -
 08-IMG_9578.JPG85 KB · Views: 416
 -
 06-IMG_9576.JPG107 KB · Views: 433
 -
 07-IMG_9577.JPG95.1 KB · Views: 584
 -
 04-IMG_9574.JPG59.7 KB · Views: 651
 -
 05-IMG_9575.JPG88.5 KB · Views: 694
 -
 01-IMG_9570.JPG60.9 KB · Views: 555
 -
 02-IMG_9571.JPG65.7 KB · Views: 557
 -
 03-IMG_9572.JPG85.3 KB · Views: 569
")