You are using an out of date browser. It may not display this or other websites correctly.
You should upgrade or use an alternative browser.
You should upgrade or use an alternative browser.
I wish I had known.... F550 purchase, build and first flights..
- Thread starter mmurfitt
- Start date


mmurfitt
Member
Some stuff I've learnt in the last couple of days..
So, getting a 3 position switch working on my DX8 has been killing me, if I had any hair I'd have been pulling it out. I just couldn't figure it out, but thank the good Lord, I've finally figured out what the problem. Predictably it was 'user' error!")
My problem started by me having a gimbal with 2x servos which were plugged in to the X1 and X2 ports on the NAZA and having the the 'U' port on the NAZA plugged in to the 'Gear' port on my AR9000 receiver (as shown by one of the YouTube videos I've been watching). So while I could change between manual and Atti mode by flicking the 'Gear' switch, I couldn't select the GPS mode!
I've now unplugged both the servo's, I don't need them at the moment anyway, and here's what I have plugged in to what..
Aux1 on the AR9000 is plugged in to 'U' on the NAZA
Aux2 on the AR9000 is plugged in to X2 on the NAZA
Aux3 on the AR9000 is plugged in to X1 on the NAZA
X3 on the NAZA has the LED module plugged in to it so can't really be used.
In the NAZA software whatever is plugged in to the 'U' port on the NAZA will change the position of the 'Control Mode Switch' position (on the TX Cali page, at the bottom), which in my case is Aux1, and on the DX8 that's set by default to the 'Flaps' switch.
On the AutoPilot page I have 'Remote Adjust' for 'Attitude Gain' pitch and roll set to X1. Because I've plugged X1 on the NAZA in to Aux3 on the AR9000, and because the DX8's knob is defaulted to Aux3 it means that my 'Knob' will change the gain settings. Also, I have the 'Attitude Gain' set to 79%, so with the knob turned all way round to 11 o'clock it means nothing is changed, however once I turn the knob it starts to increase the values. The half way point on the knob is 100% and the knob fully round to the right (1 o'clock position) the value is 150%.
At the bottom of the AutoPilot page is the 'Intelligent Orientation Control' which has a big black 'X2' next to the 'travel indicator', which basically means whatever you have plugged in to the 'X2' port on the NAZA will change this setting, and in my case this is the 3 way Aux2 switch.
On the DX8 here's what mapped to what..
The 'Flaps' 3 position switch is defaulted to Aux1 and will now flick between GPS / Atti mode / Manual
The Aux 2/Gov 3 position switch is defaulted to Aux2 and will now control the IOC (Home lock / Course lock / Off)
The 'Knob' is Aux 3
I'll probably change Aux1 3 position switch to GPS / Atti Mode / Failsafe (RTH) at some future date.
Now I have to add I've not tested any of the above, so I'll report back once I've had a fly at the weekend.
So, getting a 3 position switch working on my DX8 has been killing me, if I had any hair I'd have been pulling it out. I just couldn't figure it out, but thank the good Lord, I've finally figured out what the problem. Predictably it was 'user' error!
My problem started by me having a gimbal with 2x servos which were plugged in to the X1 and X2 ports on the NAZA and having the the 'U' port on the NAZA plugged in to the 'Gear' port on my AR9000 receiver (as shown by one of the YouTube videos I've been watching). So while I could change between manual and Atti mode by flicking the 'Gear' switch, I couldn't select the GPS mode!
I've now unplugged both the servo's, I don't need them at the moment anyway, and here's what I have plugged in to what..
Aux1 on the AR9000 is plugged in to 'U' on the NAZA
Aux2 on the AR9000 is plugged in to X2 on the NAZA
Aux3 on the AR9000 is plugged in to X1 on the NAZA
X3 on the NAZA has the LED module plugged in to it so can't really be used.
In the NAZA software whatever is plugged in to the 'U' port on the NAZA will change the position of the 'Control Mode Switch' position (on the TX Cali page, at the bottom), which in my case is Aux1, and on the DX8 that's set by default to the 'Flaps' switch.
On the AutoPilot page I have 'Remote Adjust' for 'Attitude Gain' pitch and roll set to X1. Because I've plugged X1 on the NAZA in to Aux3 on the AR9000, and because the DX8's knob is defaulted to Aux3 it means that my 'Knob' will change the gain settings. Also, I have the 'Attitude Gain' set to 79%, so with the knob turned all way round to 11 o'clock it means nothing is changed, however once I turn the knob it starts to increase the values. The half way point on the knob is 100% and the knob fully round to the right (1 o'clock position) the value is 150%.
At the bottom of the AutoPilot page is the 'Intelligent Orientation Control' which has a big black 'X2' next to the 'travel indicator', which basically means whatever you have plugged in to the 'X2' port on the NAZA will change this setting, and in my case this is the 3 way Aux2 switch.
On the DX8 here's what mapped to what..
The 'Flaps' 3 position switch is defaulted to Aux1 and will now flick between GPS / Atti mode / Manual
The Aux 2/Gov 3 position switch is defaulted to Aux2 and will now control the IOC (Home lock / Course lock / Off)
The 'Knob' is Aux 3
I'll probably change Aux1 3 position switch to GPS / Atti Mode / Failsafe (RTH) at some future date.
Now I have to add I've not tested any of the above, so I'll report back once I've had a fly at the weekend.
mmurfitt
Member
First things first, I must thank Swisser who's helped me out enormously.
We met up and he spent ages going through things with me which was incredibly helpful and reassuring.
As far as the GPS is concerned all is well, Swisser helped me set it up and calibrate it and in GPS mode it flies like a dream, and what's great is when the hexa is a ways off you can bring it to hover and just leave it hovering there while you figure out what you're doing, not having to worry about wind or anything, it's great! (and to think my first flight, ever, was in a forest beneath trees who's branches started around 30ft above my head..!!!).
Swisser also helped me setup the Return To Home (RTH) function, I have this programmed on to 'mix/hold' two-way switch, the really useful thing is we set it up regardless of what flying mode I'm in (gps/atti/manual) which means at the flick of the switch RTH is initiated and home she comes!
I tried the RTH for the first time yesterday and I must say I had sweaty palms when I flicked the switch for the first time, particularly when the hexa started to climb!
Following are some notes on what happens as well as some useful stuff I now know, also, I've tried the RTH from a hover as well as going full speed, both work perfectly.
When I tried this for the first time I had the hexa in a hover approx 15ft off the ground and about 50ft in front of me, so should anything go wrong the drop wouldn't break it too bad..
Upon flicking the switch the LED (which I've moved to the back of the Hexa so as can be seen when I'm flying it rather than it being underneath) blinks red/green, and after approx 5 seconds the hexa starts an ascent until it hits approx 60ft, at this point I've had the hexa rotate 90 degrees, 180 degrees and not rotate at all. The rotation doesn't seem to make any difference either way as it just seems to be orientating itself. The hexa then started moving towards me nice and slowly and hovered above for a few seconds, then started a nice and slow descent (I must admit to holding the tx with one hand getting ready to catch my hexa should it suddenly drop/fall.
It came to rest approx 5ft away from where it started, did a couple of small bounces and sat still with motors ticking over, which then turned off after a few seconds.
First RTH failsafe complete!
A great tip Swisser gave me was when you flick the switch and the hexa enters failsafe mode you have no control over it (obviously!) however even when you flick your designated RTH switch off to disarm the failsafe you still have no control over the hexa (a little alarming!). And here's what you need to do, something which I've done every time I've intentionally entered failsafe mode, that is to flick the flight mode switch to atti mode and back to gps flying mode. That way should you want to disarm the failsafe mid way through you'll have full control of your hexa. I've tried this, a little nervously I don't mind admitting, and it works just fine.
The last thing I've just sorted out is to set a failsafe should I ever have a loss of signal from the transmitter, something which has had me waking up at night in a cold sweat.
The last thing I want in the event of a transmitter signal loss is my hexa carrying on, on it's merry way until either the battery runs out or it hits something or someone!
What I wanted was for it to enter RTH failsafe mode and come back.
I've just read, re-read and read again the Spektrum manual and have set this functionality, I've not tested it yet, but I'll report back when I do.
However, here's what to do/what I did:
With the hexa/receiver powered off insert the bind plug.
Power on the hexa/receiver (the LED starts to flash amber/green after a couple of seconds).
Remove the bind plug.
With the transmitter powered off move the TX's sticks and switches to the desired failsafe preset (in my case I set the throttle at 60% and flicked the RTH switch to enabled).
Hold down the Trainer button and turn on the TX (ensure you do this about 1.5m away otherwise it won't bind properly).
You'll see on the DX8 screen go in to binding mode.
Let go of the trainer switch after 8 seconds or so.
The DX8 should go back to it's normal default screen after approx 15-20 seconds.
During this part of the process the LED on the hexa is still furiously blinking.
I had to do this process 3 times before it succeeded (I knew it had succeeded as there was a 'DSMX' in the top right of the DX8 screen).
When it's bound turn off the TX and remove the bind plug from the receiver.
To check this worked connect your TX to the Naza Assistant software and check everything's working ok, the first two failed attempts to bind resulted in the hexa showing it was in Failsafe mode regardless of what I did. But to check whether it's setup correctly you should be able to turn off your TX and watch the slider on the Calibration screen go in to Failsafe, and since I've already set the failsafe to RTH hopefully that's what it will do (as I said, I'll test this, nervously, and report back).
We met up and he spent ages going through things with me which was incredibly helpful and reassuring.
As far as the GPS is concerned all is well, Swisser helped me set it up and calibrate it and in GPS mode it flies like a dream, and what's great is when the hexa is a ways off you can bring it to hover and just leave it hovering there while you figure out what you're doing, not having to worry about wind or anything, it's great! (and to think my first flight, ever, was in a forest beneath trees who's branches started around 30ft above my head..!!!).
Swisser also helped me setup the Return To Home (RTH) function, I have this programmed on to 'mix/hold' two-way switch, the really useful thing is we set it up regardless of what flying mode I'm in (gps/atti/manual) which means at the flick of the switch RTH is initiated and home she comes!
I tried the RTH for the first time yesterday and I must say I had sweaty palms when I flicked the switch for the first time, particularly when the hexa started to climb!
Following are some notes on what happens as well as some useful stuff I now know, also, I've tried the RTH from a hover as well as going full speed, both work perfectly.
When I tried this for the first time I had the hexa in a hover approx 15ft off the ground and about 50ft in front of me, so should anything go wrong the drop wouldn't break it too bad..
Upon flicking the switch the LED (which I've moved to the back of the Hexa so as can be seen when I'm flying it rather than it being underneath) blinks red/green, and after approx 5 seconds the hexa starts an ascent until it hits approx 60ft, at this point I've had the hexa rotate 90 degrees, 180 degrees and not rotate at all. The rotation doesn't seem to make any difference either way as it just seems to be orientating itself. The hexa then started moving towards me nice and slowly and hovered above for a few seconds, then started a nice and slow descent (I must admit to holding the tx with one hand getting ready to catch my hexa should it suddenly drop/fall
.It came to rest approx 5ft away from where it started, did a couple of small bounces and sat still with motors ticking over, which then turned off after a few seconds.
First RTH failsafe complete!
A great tip Swisser gave me was when you flick the switch and the hexa enters failsafe mode you have no control over it (obviously!) however even when you flick your designated RTH switch off to disarm the failsafe you still have no control over the hexa (a little alarming!). And here's what you need to do, something which I've done every time I've intentionally entered failsafe mode, that is to flick the flight mode switch to atti mode and back to gps flying mode. That way should you want to disarm the failsafe mid way through you'll have full control of your hexa. I've tried this, a little nervously I don't mind admitting, and it works just fine.
The last thing I've just sorted out is to set a failsafe should I ever have a loss of signal from the transmitter, something which has had me waking up at night in a cold sweat.
The last thing I want in the event of a transmitter signal loss is my hexa carrying on, on it's merry way until either the battery runs out or it hits something or someone!
What I wanted was for it to enter RTH failsafe mode and come back.
I've just read, re-read and read again the Spektrum manual and have set this functionality, I've not tested it yet, but I'll report back when I do.
However, here's what to do/what I did:
With the hexa/receiver powered off insert the bind plug.
Power on the hexa/receiver (the LED starts to flash amber/green after a couple of seconds).
Remove the bind plug.
With the transmitter powered off move the TX's sticks and switches to the desired failsafe preset (in my case I set the throttle at 60% and flicked the RTH switch to enabled).
Hold down the Trainer button and turn on the TX (ensure you do this about 1.5m away otherwise it won't bind properly).
You'll see on the DX8 screen go in to binding mode.
Let go of the trainer switch after 8 seconds or so.
The DX8 should go back to it's normal default screen after approx 15-20 seconds.
During this part of the process the LED on the hexa is still furiously blinking.
I had to do this process 3 times before it succeeded (I knew it had succeeded as there was a 'DSMX' in the top right of the DX8 screen).
When it's bound turn off the TX and remove the bind plug from the receiver.
To check this worked connect your TX to the Naza Assistant software and check everything's working ok, the first two failed attempts to bind resulted in the hexa showing it was in Failsafe mode regardless of what I did. But to check whether it's setup correctly you should be able to turn off your TX and watch the slider on the Calibration screen go in to Failsafe, and since I've already set the failsafe to RTH hopefully that's what it will do (as I said, I'll test this, nervously, and report back).
Great thread guys since I'm sitting here unpacking my 550 box and DX8 transmitter, only to find no instructions on putting the thing together. Got the Naza, gps, and Graupner props also. After spending weeks on these and other threads, I'm not sold on the Gopro camera due to the fisheye effect. Was thinking of a little higher end video that won't distort. Any ideas are welcome. Keep the info coming....you guys are a great help!!
Great thread guys since I'm sitting here unpacking my 550 box and DX8 transmitter, only to find no instructions on putting the thing together. Got the Naza, gps, and Graupner props also. After spending weeks on these and other threads, I'm not sold on the Gopro camera due to the fisheye effect. Was thinking of a little higher end video that won't distort. Any ideas are welcome. Keep the info coming....you guys are a great help!!
Congrats on the F550 and DX8 same here. Ist step before you build is to download everthing from the DJI website. Manuals, Calibration software, USB Driver (very important) and the best soldering iron you can lay your hands on. I think the new GoPro3 looks like it does a lot of thing great. I am not at this stage ready to put my Sony NEX7 up in the air. Get some motor bearing oil to keep eveything happy. There are lots of great Youtube video on how to build, but the DJI manual does a decent job.
mmurfitt
Member
Ok, some here's some stuff I've learned about soldering....bliming soldering!
So I had a crash a month or two back which cracked the bottom plate on my 550, I've been flying it ever since absolutely fine, but I had another small crash last week with one of the motors giving out on me and pitching the hexa in to the grass (fortunately no damage was done as I was only 10ft above the ground). I figured I was suffering from the DJI quality control problems on their dodgy ESC bullet connectors, so I decided to not only solder all the bullet connectors but also replace the bottom plate.
Man-oh-man is that a lot of work, I don't know if I'm slow (probably) but it pretty much took me two days of work to strip the hexa down and rebuild it re-soldering everything back again.
Now if you're like me and have soldered in the past, but not for a long time, then here's some bits and pieces I've learned over the past couple of days.
You need a good soldering iron.
The one I'm using is pretty good, it's a digital unit which allows me to change the temperature at the push of a button, anything up to 450 C, which is very useful. I've been amazed at how quickly this thing gets hot, it will go from being stone cold to 400 C in around 8-10 seconds. It cools down pretty quick as well.
I'm always for making life as easy for myself as possible, and to that end get a chisel point on the end of your soldering iron, I was using the 'spike' pointy one that came with iron to begin with and it's a complete nightmare. I reckon the perfect size chisel point is around 2-3mm, it just makes everything so much easier.
Before you solder/melt a connection put a small bit of solder on either side of the chisel point, I'm sure there's a technical reason for what happens, but when you start soldering with melted solder on the end your wire/connection heats up so much quicker, I guess it's something to do with the whole liquid metal thing.
The above is particularly pertinent when you need to melt and remove wires which are already soldered, like I did when remove the ESC's from the bottom plate, simply holding a 'naked' soldering iron on the connection will melt it, eventually, but it takes ages and I was worried the heat transference up the wire to the ESC's would damage them.
A problem I had every 8-9 soldering items I did was the chisel point wouldn't accept the small blob of solder, meaning it took ages to melt/heat stuff. What I discovered was if this happens the chisel point needs cleaning. You should be wiping the soldering iron on the wet sponge which probably came with the soldering kit before and after every time it leaves its cradle, however I noticed the chisel tip would go dark and not keep the small blob of solder on it (with it either simply rolling off the chisel point or refusing to leave the solder string). To clean it I used a small very fine file, it worked a treat.
Something else I tried using was applying flux on the joint before soldering, to be honest I didn't really notice any difference whether I used it or not and I'm pretty sure it was the flux which was causing my iron to get all dirty, so I stopped using it.
This next thing caught me out a couple of times, that is before you solder put the heat shrink on your cable first! It's so disheartening finishing your soldering then realising you forgot the flipping heat shrink again!
When melting solder and removing components have a solder sucker to hand, it's great for removing unwanted solder at the push of a button.
I also re-soldered some deans connectors on two batteries as I wasn't happy with the connection, to be honest I have a complete nightmare with deans connectors, I properly hate them! No matter how much I try they always give me a lot of agro.
In fact one of the batteries has to be re-soldered again as I took it out yesterday and I still wasn't completely happy with the connection it made (the last thing I want is the hexa being 100ft in the air with a dodgy battery connection).
Now don't get me wrong, I'm in no way a good solder-er, but having just done hours and hours of it in one go I thought I'd share some lessons learned.
I hope this helps someone in some way, I wish I'd have known particularly the bit about putting a blob of solder on a chisel bit before I started my hexa, it would have made life a whole lot easier..
Lastly, there's an anthem you need to sing when you're doing a lot of soldering, it's by the Killers..
'I got soul but I'm not a solder-er,
I got soul but I'm not a solder-er...'
Davidhippo
Member
Great tips Mmurfitt, I must admit soldering is not one of my strong points.... But I solder on.....(!)I've recently ditched all my deans and gone over to xt60 connectors I find these much easier to work with, soldering is much much easier and a more positive connection when plugging in. The process of putting solder on to the tip before working is apparently known as 'tinning', don't get me wrong I'm no expert either, but have a friend who's been doing it for years.I notice on your signature you mention the tm1000 doesn't do anything, I've soldered the voltage probes into the one of the + and - pads onto the base plate of my 550, I can now flip through the lcd pages on my dx8 whilst the copter is in flight and see what the voltage of my battery is running at.... Very useful for knowing when I'm going to hit first or second level protection thresholds. Keep up the good work, I'm sure I can speak for all that we're learning with you. By the way, how is your go pro mounted?
mmurfitt
Member
Ah, 'tinning' that's a phrase I've heard a couple of times
I might have a look at the connectors you suggested instead of the crappy deans connectors. Actually there's probably little wrong with deans connectors its more my soldering ability which is lacking!
Good idea about the TM1000, how do you view the information on your TX?
Although that may be a mute point as I flew partially FPV on Friday and am thinking an OSD would be really useful and I'm reasonably sure they have the battery voltage built in.
I'm glad you've found elements of this thread interesting/useful, most of the things I'm learning, i'm learning the hard way, so if I can help anyone else navigate the minefield it is to getting in to multirotors then great!
Sent from my iPhone using Tapatalk
mmurfitt
Member
Sorry, forgot to answer your question about the GoPro.
I have a gimbal and landing gear, I'll post a link to the one i bought when I'm back at my desk as I don't have it with me.
I've followed some advice on this forum and used earplugs cut in half which the GoPro sits on to help with the 'jello' affect, and i have to say, surprisingly, it works really well. It prettying eliminates all of the crappy wobbly effect.
I do however have a bit of a gimbal issue I'm trying to get to the bottom of at the moment, I want to use my aux3 knob to be able to control the pitch of the gimbal, but try as might I can't get the darn thing to work!
The servos I'm using are pretty cheap ones which came with the gimbal, which in itself is also pretty cheap (compared to the Zenmuse anyway).
I have some tests to run (plugging the servo directly into the receiver, swapping the servo over with the one which controls the 'roll' - which I'm not using at the moment). Once I've figured out where the issue lies I'll post the solution here.
Sent from my iPhone using Tapatalk
Question guys....My 550 is built and flying. Everything works as advertised, but I'm getting some wobble in a hover. Not the toilet bowl, but just a little wobble that needs to go away. I'm playing with the gains but it's still doing it. I do have stock (unbalanced) props...waiting on my Graupner's. You guys have a smooth hover ?? and if so, can you post your gains you're using?
mmurfitt......... Spektrum TM1000 telemtry (I've unplugged this, it doesn't seem to do much of anything) Mine's working fine.....tells me the battery voltage onboard...yours doesn't??
mmurfitt......... Spektrum TM1000 telemtry (I've unplugged this, it doesn't seem to do much of anything) Mine's working fine.....tells me the battery voltage onboard...yours doesn't??
mmurfitt
Member
Question guys....My 550 is built and flying. Everything works as advertised, but I'm getting some wobble in a hover. Not the toilet bowl, but just a little wobble that needs to go away. I'm playing with the gains but it's still doing it. I do have stock (unbalanced) props...waiting on my Graupner's. You guys have a smooth hover ?? and if so, can you post your gains you're using?
Hey Marty,
If you've read much of this particular thread then you'll realise I'm perhaps not the best qualified to offer advice, but since no-one else has stepped up to the plate I may as well offer my tuppence worth.
As far as the gains are concerned they shouldn't be used, not really, for trying to fix problems like wobbling or wandering, they should really be used for changing the handling of the hexa, so with that in mind I'd stick the gains to default (100 across the board) and look to fix the actual issue.
As I've not actually had this problem I can't really speak from personal experience, but here's some stuff I'd try..
Do you have the Naza fixed firmly, and secured with a cable tie?
Is the Naza pointing forwards?
Have you recalibrated the sticks? (I've learned to do this pretty much any time I make any change to the FC software).
Does it wobble in atti mode and manual mode, or is it just in GPS?
If it's GPS, have you re-calibrated the GPS?
If it does it in all modes then it might be worth unplugging and taking the FC out and reseating it again..just to be sure.
How bad is the wobble? It might be worth posting a video of it, to show those who's experience is greater than ours..
I don't know about balancing props, but I never flew my hexa with the DJI props, in fact from reading threads on this forum I'd go as far as to say don't fly your hexa further than you want it to fall with the default props. Yes, they're that bad!
Are all the props seated correctly?
Are they all spinning in the right directions:
No.1 prop - anticlockwise
No.2 prop - clockwise
etc, etc..
mmurfitt......... Spektrum TM1000 telemtry (I've unplugged this, it doesn't seem to do much of anything) Mine's working fine.....tells me the battery voltage onboard...yours doesn't??
Thanks for the advice, I actually hooked up the TM1000 last night and so now have the battery information on my TX now as well..although, ironically, I've ordered an OSD today which will render the TM1000 useless..and dead-weight.
Hey thanks for the response. Just got back from flying and with the gains down, still have a very slight wobble. Don't know how that will translate to the go-pro gimbal yet as it's waiting to be built. After reading your response you've made me realize that I need to systematically troubleshoot this in all phases. Trouble is I get out there with the timer running and just want to fly. I'll start tomorrow on the troubleshooting. Thanks!!
PilotHal
Real Pilot, RC's Too
Just about to receive my new DJI F550 with WKM! Help!
Hello!
I have been reading this thread with great delight!
I have been flying my mCPX for a while now using a DX8. I had a Blade 450 3D and hated it, so I eBay'd it. I had plans on building a TREX 550E DFC, but this hexacopter thing bit me in the butt! I don't have a lot of time right now to head down to the field and work with the local boys in the club to get a 550E with the BeastX going. So in the meantime, I wanted to be different and go the hexacopter route since I believe that I will stand a better chance of getting this thing built and in the air on my own. In January, when I have more time, I'll go the TREX route.
Anyway, I have one the way, a DJI F550 with the Wookong-M and the basic 550 landing gear. I can't wait to get it! I so appreciate the tips on soldering as it has been a while. So I broke out the old Weller 40W (WLC-100) and installed the chisel point. Tinned it; and twisted 2 wires together to see if I remembered how to solder. I had to keep the knob at position 3 - position 5 seemed way too hot! I successfully soldered two wires together. :nevreness: I bought flux from Radio Shack, but I'm not sure I will use it when soldering connections to the lower board (suggestions?)
Also, I'm curious which gauge wire to use to make the power lead cable from the bottom board? Also, what kind of connector do I use for that? I have never soldered a connector on to a battery before either. Is there anything to be careful about? I know, I shouldn't short the leads! But I'm not sure if there are any hidden caveats that I'm unaware of. Also, I'm not sure what size battery to use as well.
Thanks in advance for the responses!
mmurfitt
Member
Hey thanks for the response. Just got back from flying and with the gains down, still have a very slight wobble. Don't know how that will translate to the go-pro gimbal yet as it's waiting to be built. After reading your response you've made me realize that I need to systematically troubleshoot this in all phases. Trouble is I get out there with the timer running and just want to fly. I'll start tomorrow on the troubleshooting. Thanks!!
I was more thinking of videoing it on your mobile phone or something, to show what it looks like from your perspective..
I know exactly what you mean, once you plug that lipo in, the clock's running and who wants to waste any precious time!?
mmurfitt
Member
Hello!
I have been reading this thread with great delight!
I have been flying my mCPX for a while now using a DX8. I had a Blade 450 3D and hated it, so I eBay'd it. I had plans on building a TREX 550E DFC, but this hexacopter thing bit me in the butt! I don't have a lot of time right now to head down to the field and work with the local boys in the club to get a 550E with the BeastX going. So in the meantime, I wanted to be different and go the hexacopter route since I believe that I will stand a better chance of getting this thing built and in the air on my own. In January, when I have more time, I'll go the TREX route.
Anyway, I have one the way, a DJI F550 with the Wookong-M and the basic 550 landing gear. I can't wait to get it! I so appreciate the tips on soldering as it has been a while. So I broke out the old Weller 40W (WLC-100) and installed the chisel point. Tinned it; and twisted 2 wires together to see if I remembered how to solder. I had to keep the knob at position 3 - position 5 seemed way too hot! I successfully soldered two wires together. :nevreness: I bought flux from Radio Shack, but I'm not sure I will use it when soldering connections to the lower board (suggestions?)
Also, I'm curious which gauge wire to use to make the power lead cable from the bottom board? Also, what kind of connector do I use for that? I have never soldered a connector on to a battery before either. Is there anything to be careful about? I know, I shouldn't short the leads! But I'm not sure if there are any hidden caveats that I'm unaware of. Also, I'm not sure what size battery to use as well.
Thanks in advance for the responses!
Hey PilotHal,
I'm glad some of the lessons I've learned (the hard way) have been of some use..as well as the other advice given here.
I must admit to being a little jealous you're getting the Wookong, man but I'd love one of those bad boys...just can't afford it.
I'm not sure what they go for your side of the pond, but in the UK they start at a little under £800!! ($1300). The Wookong is definitely on my list of things to get, but at the moment I just need to used to, and competent, with what I have.
Regarding the chisel point and power lead cables, I went in to my local hobby shop and bought yet another round of deans connectors to try and solder my two batteries which refuse to accept a deans connector.
The guy behind the counter took pity on me (having served me on numerous occasions buying said deans connectors) and gave me some advice, he said that when he solders deans connectors he uses a wide chisel point. He indicated (using his fingers) a chisel point of around 1cm!
I'm not sure that chisel point will be any good for anything other than the deans connectors, but I'm going to buy one next time at my local electrical shop and give it a go.
I've also bought a 'Mr Jig' from HobbyKing which holds the Deans conector in place, which is helpful. I also have some 'helping hands' which makes life a little easier. (in my opinion, if you're not a regular soldering then the more help the better!)
When you're soldering remember...
'I've got soul but I'm not a solder-er,
I've got soul but I'm not a solder-er..'
...repeat as many times as necessary
I also bought some power cable to extend the cables from the two 'Zippy' batteries I've been struggling to solder the deans connectors to (I've tried that many times that the cables are getting a little short!!!)
My hobby shop guy suggested that due to the ampage required by 6 'small' hexa motors that the actual size and capacity lead on my lipo is way over the top (he's a helicopter guy, so he kind of looks down his nose at me, in a nice way). I pointed out to him that the ESC's which come with the DJI F550 kit are rated at 30A, which he then countered with that if each motor were pulling 30A the deans connector would have melted under the 180A load!
He did a quick calculation based on each motor pulling 5A's on 10mins worth of battery to arrive at cable which was rated at 25A, but I think you'd be better served getting this information from somebody who actually understands this stuff as I'm simply relaying what my guy told me yesterday.
This is all a convoluted way of saying check out Hobby King, or even better go to your local hobby shop, take a battery and explain to them what you need.
If you're lucky some kind forum member will have a look on HobbyKing and post a link for you, I would, but I'm really not the best source of experience and I'd hate to point you to some cable which wasn't capable enough.
Regarding the flux, as previously mentioned I really didn't find it made any difference. It was probably more the way I was using it, but all it did was smoke more, smell a little weird and make my soldering chisel point go black which meant I couldn't tin it.
Soldering the batteries, I just did it, I didn't discover anything special, only try and do it quick, which if you get a wider chisel point shouldn't be a problem to achieve. Oh, and just heat shrink, I put two lots on, one thiner gauge for the actual cable and another wider gauge to cover the base of the deans connecter and the two cables.
The batteries to buy, as shown in my signature I went for 4s 5000mAh batteries as they seemed to offer the best power to weight ratio.
Something I can't advise enough is to get the Graupner props, I went for the 10x5's, but you go with whatever you want. But, do not use the crappy old DJI props, not even once!
PilotHal
Real Pilot, RC's Too
Thanks for the response mmurfitt! Yeah, I had to go for the WKM - no problem for me with the $'s. Don't hate me 'cause I'm lucky!
I have the chisel point going on the Weller 40W'r, so I'm going to see how that all works out before I spend on a more expensive iron.
Thanks for the other information as well regarding the batteries et al.
WRT to the Graupner props; I have heard that the standard DJI's are just plain rubbish and I shouldn't risk my copter with them. I also saw on a YT video a guy recommending the 8x5's. He also said that I will have to bore out the hole a bit to make them fit the 8mm shaft on the motors.
What is the difference between the 10x5's and the 8x5's? I know I'll need 3 right-hand and 3 left-hand turning props. Will I also have to modify them to fit?
Thanks!
mmurfitt
Member
WRT to the Graupner props; I have heard that the standard DJI's are just plain rubbish and I shouldn't risk my copter with them. I also saw on a YT video a guy recommending the 8x5's. He also said that I will have to bore out the hole a bit to make them fit the 8mm shaft on the motors.
What is the difference between the 10x5's and the 8x5's? I know I'll need 3 right-hand and 3 left-hand turning props. Will I also have to modify them to fit?
Thanks!
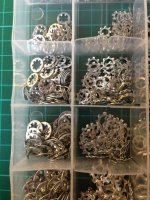
I didn't have to bore the props out, the Graupners fit just fine, although having said that I didn't try the 8x5's, but I assume they're the same.
My top tip for the graupners is they don't have a flat edge inside the bore like the DJi's do which helps to grip the motor prop shaft. There seems to be various tips and tricks on how to get round this, me being me pretty much ignored all of them and did my own fix....which was..
In the UK we have star shaped serrated edged washers, I used one on either side of the prop to allow it to grip the motor below and grip the locking nut above. It worked great, I've had no problems whatsoever, and because the gripping washers offer pressure (due to their serration) it keeps the nut from shaking loose (although I'd still recommend checking all the nuts every now and again.
Here's what they look like (at least this side of the pond anyway):
View attachment 8020