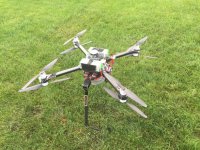
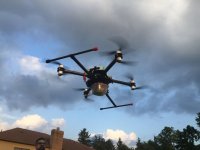
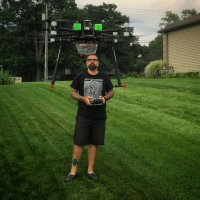
Hexacrafter to release x8 frames.

Hexacrafter

Manufacturer
Most never need to make any adjustments to motor alignment as they are usually within .1 degree. The very large frames can be a bit more..
For those seeking perfection, adjustments can be made by either sanding the arm as done by Kloner or by using shim washers under one side of the motor. Usually 1 shim on the 2 low side motor bolts works perfect.
We have started shipping motor shim washers with the kits to make it as easy as possible.
They are nothing special created by HexaCrafter, but rather standard 3mm x 6mm x 0.1mm steel washer shims.
The process takes a few minutes per motor, but once it is done, it is permanent and further tuning is not required.


Hexacrafter

Manufacturer
Moto..
I am not where I can get at that info... I will post when I get back to the shop....
I just did not want you to think I was being unresponsive....


Hexacrafter

Manufacturer
Moto, Here are the stats for the HQ series.
HQ-850S - 1022 grams
HQ-850L - 1078 grams
HQ-1150S - 1134 grams
HQ-1150L - 1190 grams
Landing Gear Mounting Struts- Add-On accessory- 150 grams
SEIP- small electronics isolation plate - Add-On accessory- 36 grams
Tarot Retract landing gear pair with CF mounting kit- 488 grams.
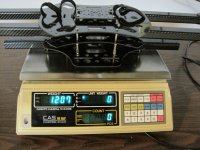
Complete HQ-850S with Landing gear mounting struts and SEIP- 1208 grams
Complete HQ-850S with Landing Gear mounting struts, SEIP and Tarot retracts- 1696 grams.
View attachment 25137 View attachment 25138
 

Attachments

  • IMG_2879.JPG
    IMG_2879.JPG
    105 KB · Views: 389
  • IMG_2876.JPG
    IMG_2876.JPG
    96.8 KB · Views: 547


SleepyC

www.AirHeadMedia.com
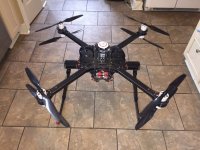
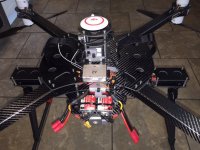
It's DONE! And it's AWSOME! SOOOOOOOO AWESOME! When you hold this think in your hand it screams quality. Seriously the best rig I have ever build. Everything is hidden, and has it's place... You can make this with the ability to fold, but I don;t travel on planes so I made mine ridged. I'm just waiting on the Movi M5 mounting plate and vibe damper which should be in Tomorrow or Tuesday. CAN NOT WAIT!

I set the A2 with the recommended gains for a heavy S1000, I'll strap some weight to it as soon as the weather allows and try to get my tune on!

This is basically Multirotor PORN!

View attachment 25236 View attachment 25237 View attachment 25238
 

Attachments

  • IMG_3086.JPG
    IMG_3086.JPG
    110.8 KB · Views: 280
  • IMG_3087.JPG
    IMG_3087.JPG
    109.9 KB · Views: 289
  • IMG_3088.JPG
    IMG_3088.JPG
    112.2 KB · Views: 285

Pumpkinguy

Member
Awesome build. Nice attn to detail. I was thinking about getting these as a quick and secure way of holding, removing the retracts into the tarot actuators.
View attachment 25250

Problem is I cant find them in Canada and since ITAR, McMaster Carr wont ship to Canada. They wont even ship to my UPS box south of the border. I guess they don't want these locking pins used in the manufacturing of weapons of mass destruction. Epic fail!!!!

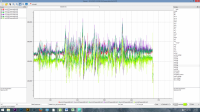
Back to the shimming of the motors. I have the Hexacrafter 1100. I suspect those long arms could use some fine tuning. Can you guys tell by looking at the M1-M6 outputs in the data log which ones need adjusting?? Or is it a trial by error? I would think just the slightest bit of wind could toss a turd into the process.
 

Attachments

  • 90995a110p2-b02l.png
    90995a110p2-b02l.png
    7.8 KB · Views: 288


scotth

Member
I shimmed my motors by referencing the top of the IMU to the top of the motor using an iPhone level. I found that most were out about .5°-.8°, all in the same direction. Possibly due to a slight twist in the arm.. or as a result of my torque sequence on the top and bottom plates. In any case, I simply loosened the motor mount screws and slipped a piece of manila folder under the low side, locating it as needed to get the motor at zero. I settled for getting them within .1°-.3°, and my motor curves all fell exactly on top of one another. I know you didn't ask how I did it.. but I'm not smart enough to know if one motor is out, which one it is. I have an A2 with U7's.
 

Mojave

Member
Back to the shimming of the motors. I have the Hexacrafter 1100. I suspect those long arms could use some fine tuning. Can you guys tell by looking at the M1-M6 outputs in the data log which ones need adjusting?? Or is it a trial by error? I would think just the slightest bit of wind could toss a turd into the process.

View attachment 25252

This graph was from awhile ago; when I was working with Steve. He mentioned that the motors should be working in concert in level flight; other wise they will tend to fight one another using up power and heating up. I do not remember if this graph is level flight it was from about a year ago. I took part of graph and enlarged it to show the differences [ (@kloner) could explain this better]. Therefore on my hexacopters' U7 motors: M1, M3, and M5 graphs should be close to each other and same for M2, M4, and M6. Ideally during level flight with no wind the graphs should be very close to each other, or lay on top of one-another. There is existentially no place on the graph where the outputs match :-(. My hexacopter flew OK but some of the motors ran a bit hotter - though well within tolerances.

I did get them lined up better with time and there are two ways to do this. At first I used a 3/4 inch aluminium square tube (box beam) that was truly flat and placed the mid point of the motor at the propeller mount. Then I swung the beam until it touched neighboring motors. I sanded the arm until the beam 'hit' the neighboring motors in the same spot (Steve showed this technique to me). Then I continued around to each arm; This does not come out perfect due to minor variations in each build - but it ran more efficiently. This is a similar technique that is on the HexaCrafter site (http://www.hexacrafter.com/content/category/13-kloner-built-pro-tip-videos). Since I used 18 inch props I think a similar technique, though not quite as accurate, would be to make sure all the prop tips line up tip to tip across the arms.
 

Attachments

  • HC1100L20140727AM-FLY027.jpg
    HC1100L20140727AM-FLY027.jpg
    107.5 KB · Views: 440

Mojave

Member
I shimmed my motors by referencing the top of the IMU to the top of the motor using an iPhone level. I found that most were out about .5°-.8°, all in the same direction. Possibly due to a slight twist in the arm.. or as a result of my torque sequence on the top and bottom plates. In any case, I simply loosened the motor mount screws and slipped a piece of manila folder under the low side, locating it as needed to get the motor at zero. I settled for getting them within .1°-.3°, and my motor curves all fell exactly on top of one another. I know you didn't ask how I did it.. but I'm not smart enough to know if one motor is out, which one it is. I have an A2 with U7's.

Wow - sounds like you had a similar experience that I did - the arms tended to be slightly twisted. You found a great technique - especially with the curves aligning! Great Job!
 

SleepyC

www.AirHeadMedia.com
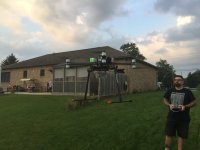
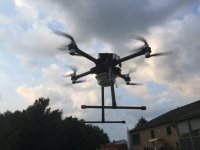
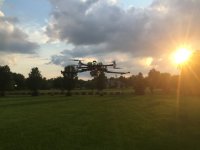
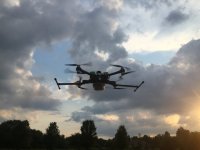
She's flown! And the Hexacrafter X8 is BADDDDD ASSSSS!!!
TIP: 3 blade props SUCK on X8's WAY to flexy. Changed to 2 blade CF 15" props and BAM... solid as a rock! Were had 6.5+ lbs of ballast on the rig and it was SO SOLID!

LOVE, LOVE LOVE this rig. The Avroto 3520's are rocking super smooth!! A2 took a tiny gain tweak and it was rock solid.
Thanks to Andrew for helping out today and making an awesome airframe! Few more shake down flights and the M5 gets strapped on!


View attachment 25324 View attachment 25325 View attachment 25326 View attachment 25327 View attachment 25328 View attachment 25329 View attachment 25330 View attachment 25331 View attachment 25332 View attachment 25333 View attachment 25334 View attachment 25335 View attachment 25336 View attachment 25337 View attachment 25338
 

Attachments

  • IMG_3170.JPG
    IMG_3170.JPG
    187.8 KB · Views: 413
  • IMG_3171.JPG
    IMG_3171.JPG
    171.4 KB · Views: 457
  • IMG_3172.JPG
    IMG_3172.JPG
    179.7 KB · Views: 368
  • IMG_3173.JPG
    IMG_3173.JPG
    138.4 KB · Views: 423
  • IMG_3174.JPG
    IMG_3174.JPG
    188.8 KB · Views: 269
  • IMG_3175.JPG
    IMG_3175.JPG
    51.9 KB · Views: 482
  • IMG_3176.JPG
    IMG_3176.JPG
    52.7 KB · Views: 334
  • IMG_3177.JPG
    IMG_3177.JPG
    60.7 KB · Views: 340
  • IMG_3178.JPG
    IMG_3178.JPG
    73.9 KB · Views: 336
  • IMG_3179.JPG
    IMG_3179.JPG
    78.3 KB · Views: 323
  • IMG_3180.JPG
    IMG_3180.JPG
    71.8 KB · Views: 289
  • IMG_3181.JPG
    IMG_3181.JPG
    52.7 KB · Views: 236
  • IMG_3182.JPG
    IMG_3182.JPG
    53.8 KB · Views: 246
  • IMG_3183.JPG
    IMG_3183.JPG
    52 KB · Views: 255
  • IMG_3184.JPG
    IMG_3184.JPG
    54.8 KB · Views: 297
  • IMG_3185.JPG
    IMG_3185.JPG
    55 KB · Views: 190
  • IMG_3188.JPG
    IMG_3188.JPG
    96.4 KB · Views: 225

Mojave

Member
LOVE, LOVE LOVE this rig. The Avroto 3520's are rocking super smooth!! A2 took a tiny gain tweak and it was rock solid.
Thanks to Andrew for helping out today and making an awesome airframe! Few more shake down flights and the M5 gets strapped on!
@SleepyC -
1) Did you spend much time aligning your motor mounts with each other?
2) Are the props the same size on the top as the bottom of your coaxial set-up?
 

SleepyC

www.AirHeadMedia.com
@SleepyC -
1) Did you spend much time aligning your motor mounts with each other?
2) Are the props the same size on the top as the bottom of your coaxial set-up?

1) Did not... I may eyeball that when I have some time, but it was so smooth not sure it's needed.
2) 15/5 all around.
 

SamaraMedia

Active Member
Looks awesome Sleepy!

I've been wondering about the triple prop setup myself, still tuning my Tarot X6 with KDE triple prop adapter and DJI 15" props and wondered if they are to flexible, they are convenient for transport in a car though. I've also tried some 14" 2 blade CF props on the rig which is running KDE 4012's. Still on the fence on 2 or 3 blade setup.


SleepyC

www.AirHeadMedia.com
Looks awesome Sleepy!

I've been wondering about the triple prop setup myself, still tuning my Tarot X6 with KDE triple prop adapter and DJI 15" props and wondered if they are to flexible, they are convenient for transport in a car though. I've also tried some 14" 2 blade CF props on the rig which is running KDE 4012's. Still on the fence on 2 or 3 blade setup.

The 3 blades I used were basically the KDE 3 blade with DJi props. The rig was twitchy, and the motors were spooling at around 80% to lift the same weight. Andrew and I were both like "This rig should lift this with ease WTF. So we thought about it, and popped on some 2 blade 15" carbons, entirely different rig. Took off and was smooth as a baby bottom. Tiny bit of gain tweaks and it was perfect (for now).
If any body wants to try 8 3 blade props 15" let me know I'll make ya a smoking deal.

I actually think they work GREAT with weights up to 12 - 14 lbs AUW. But at around 22lbs, they no good.


Top