Bartman
Welcome to MultiRotorForums.com!!
those are the battery monitors I use.
http://hobbyking.com/hobbyking/stor...2_8S_Cell_Checker_with_Low_Voltage_Alarm.html
like i said above, and like Doug probably did, break off the plastic case and just use some velcro to hold them in place.
Continuing with the build........
The computer comes first as you'll need it to check out your flight controller. The F450 Flamewheel puts the main NAZA unit inside the frame so it will be well worth it to give it some of your time before you start assembling the frame and motors.
To do this you have to have
http://www.dji.com/download/flame-wheel-arf-downloads/
So, the three things we've got organized now are the NAZA Assistant (A GUI technically, check the abbreviations guide HERE ), the user manuals, and how the latest firmware will be delivered (automatically from within the NAZA Assistant)
With the NAZA V1, in order to connect it to a computer you need to wire it to your receiver and you also need to put a battery connector on your VU (Versatile Unit) so it can be powered up with a 3 or 4S Lipo. Whatever you do, don't cut any wires at this time to attach a connector, just strip a little wire back and put a connector on it. we'll cut it to length later on when we have the layout of everything all settled.
Working out some of the kinks with the flight control system now will make it easier later when we are trying to decide where to mount everything. yes there are directions and they do a good job of getting you through all of this but I'll briefly discuss a strategy for laying out the pieces while also beginning the frame assembly. These initial decisions and the process of planning takes the most time. Once everything is decided the build will go very quickly and you'll be surprised at how quickly you're going to be ready to test fly the helicopter.
So, in summary;
NOW IS ALSO A GOOD TIME TO TAKE A BLACK MAGIC MARKER AND PUT AN ARROW ON TOP OF THE NAZA POINTING FORWARD. PUTTING THE NAZA ON THE HELI BACKWARDS HAS BEEN THE MOST COMMON MISTAKE I'VE SEEN SO FAR AND THE ARROW WILL REDUCE THE CHANCE OF YOU MAKING THIS MISTAKE AS WELL.
Here's a good NAZA introduction video
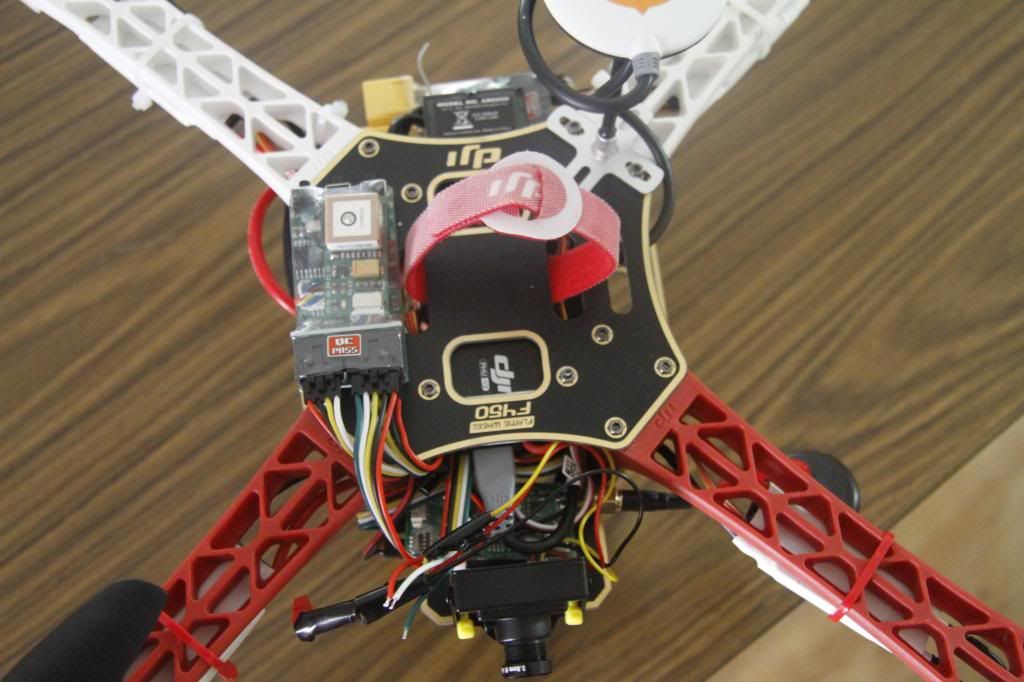
Here's the next video showing the placement of the components. If you absolutely positively must attach something to something else in order to feel like you've accomplished something, put the arms on the lower frame plate. Don't overtighten the screws!!!!! I like to use the red arms as the rear arms and the battery connect points should be at the rear of the heli also and facing up.
Here'a a good video from DJI showing the basics but I'll review this stuff tomorrow when I shoot another video
That's it for now. Don't forget to STOP and ask questions if you're following along now or in the future.
Bart
http://hobbyking.com/hobbyking/stor...2_8S_Cell_Checker_with_Low_Voltage_Alarm.html
like i said above, and like Doug probably did, break off the plastic case and just use some velcro to hold them in place.
Continuing with the build........
The computer comes first as you'll need it to check out your flight controller. The F450 Flamewheel puts the main NAZA unit inside the frame so it will be well worth it to give it some of your time before you start assembling the frame and motors.
To do this you have to have
- The lastest version of the NAZA Assistant, this is the program that runs on your computer and allows you to interact with the NAZA so you can configure, monitor, and make adjustments to it
- The latest version of the NAZA and F450/550 instruction manuals
http://www.dji.com/download/flame-wheel-arf-downloads/
- When you first run the latest version of the NAZA Assistant it will check to see if the latest firmware is installed on your NAZA. Mine didn't so I updated to the latest version. Yes, this can be risky but I'm going full steam ahead here and I"m going to fly it with the latest version for better or for worse. We'll see what happens.
So, the three things we've got organized now are the NAZA Assistant (A GUI technically, check the abbreviations guide HERE ), the user manuals, and how the latest firmware will be delivered (automatically from within the NAZA Assistant)
With the NAZA V1, in order to connect it to a computer you need to wire it to your receiver and you also need to put a battery connector on your VU (Versatile Unit) so it can be powered up with a 3 or 4S Lipo. Whatever you do, don't cut any wires at this time to attach a connector, just strip a little wire back and put a connector on it. we'll cut it to length later on when we have the layout of everything all settled.
Working out some of the kinks with the flight control system now will make it easier later when we are trying to decide where to mount everything. yes there are directions and they do a good job of getting you through all of this but I'll briefly discuss a strategy for laying out the pieces while also beginning the frame assembly. These initial decisions and the process of planning takes the most time. Once everything is decided the build will go very quickly and you'll be surprised at how quickly you're going to be ready to test fly the helicopter.
So, in summary;
- Set up your computer with the NAZA Assistant
- download the user manuals
- put a battery connector on your VU
- follow the diagram in your manual to connect the radio channels to your NAZA-M (just do 1 to 5 for now with channel 5 on a 3-position switch)
- connect the VU to the NAZA-M (and the GPS antenna if you have one)
- take a break before going back over everything to make sure it's been done correctly according to the manual.
NOW IS ALSO A GOOD TIME TO TAKE A BLACK MAGIC MARKER AND PUT AN ARROW ON TOP OF THE NAZA POINTING FORWARD. PUTTING THE NAZA ON THE HELI BACKWARDS HAS BEEN THE MOST COMMON MISTAKE I'VE SEEN SO FAR AND THE ARROW WILL REDUCE THE CHANCE OF YOU MAKING THIS MISTAKE AS WELL.
Here's a good NAZA introduction video
Here's the next video showing the placement of the components. If you absolutely positively must attach something to something else in order to feel like you've accomplished something, put the arms on the lower frame plate. Don't overtighten the screws!!!!! I like to use the red arms as the rear arms and the battery connect points should be at the rear of the heli also and facing up.
Here'a a good video from DJI showing the basics but I'll review this stuff tomorrow when I shoot another video
That's it for now. Don't forget to STOP and ask questions if you're following along now or in the future.
Bart
Last edited by a moderator:


