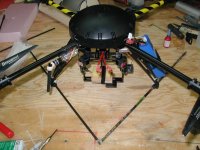
XAircraft XAircraft X650 tuners of the world, UNITE!

Bartman

Welcome to MultiRotorForums.com!!
Let's get these little buggers flying perfect. stable, smooth, precise. There's bound to be hardware adjustments as well as software adjustments so it's in the general discussion area.
Let's hear what you folks are doing (other than not crashing please, spare me the humiliation by not pointing that out) to make these things the best they can be. This would be a perfect opportunity for Jingchen to join in but he hasn't taken me up on the invitations I've sent. I'll try again but let's get to work on this. We've got enough X650 owners here to make some progress and improve our craft.
Bart
 

brendonvz

Member
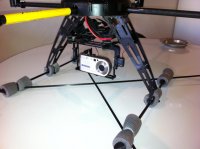
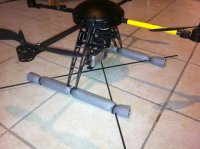
Well for one, I've strengthen up the landing gear , that flimsy foot was just not good enough, I just layered some more fibre on the "ankle" part and glued it on, I'd recomend it to any new pilots with a tendancy to cut the throttle at a sight of danger.
 

Bartman

Welcome to MultiRotorForums.com!!
reinforcing the gear legs at the ankle is definitely worthwhile. can you post pics of where yours snapped?
personally, i prefer to roll inverted and bounce the dome in the dirt to keep my landing gear safe. it's a very advanced technique but so far I'm 1 for 1. :)

here's a question, my X650 drifts even though I've reinstalled the AHRSs firmware and reinitialized it. i can either bend the mounts to trim out the drift or put washers under the FC/AHRSs stack to make a level airframe equal a level AHRSs. anyone have an opinion on that?
bart
 

brendonvz

Member
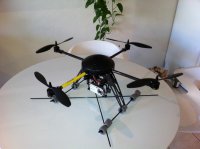
What I might try is creating longer arms , I've got some carbon fibre tube on order, so maybe double the length of the arms to create more stability, would this in turn affect the AHRS, as its probably tuned to fly with arms at a specific length ?
Anyone tried this?

And bigger props too :)
 
Last edited by a moderator:

brendonvz

Member
Well for one, I've strengthen up the landing gear , that flimsy foot was just not good enough, I just layered some more fibre on the "ankle" part and glued it on, I'd recomend it to any new pilots with a tendancy to cut the throttle at a sight of danger.

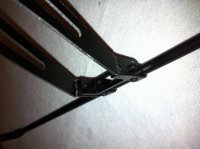
this is the break which I just super glued back, then added some extra bits of support to after the pic was taken, I’ll let you know how well it works. I might even lay a crossbeam from the left to right for some added support (I have a spare carbon fibre rod which needs using)
 

Attachments

  • IMG_0362.jpg
    IMG_0362.jpg
    142.5 KB · Views: 352
Last edited by a moderator:


Bartman

Welcome to MultiRotorForums.com!!
brendon,
glad to see you're still at it. i'm waiting on parts and then i'll be right back at it myself. i'm planning to do a teardown and rebuild to make sure everything is tight and installed in perfect alignment with everything else. i figure it'll take a few hours (few hours=one six-pack) to get done and then it'll get a software upgrade and a realignment of the ahrs. from there it'll get some play with the PID's and then she's getting put to work if everything is up to snuff.
no more playing around with this for me. i've flown it, wrecked it, flown it, wrecked it, flown it, wrecked again, and now it's time to get serious. i've either got to stop flying it or stop wrecking it. we'll see how it turns out. :)
bart
 

brendonvz

Member
sounds a good plan... I wrecked the girlfriends fave plant (kinda like a weed wacker- oops)
It comes down to having patience with me , to much of rush to get out there and fly it .... What do you mean by "..Realignment of the AHRS.." How do you do that ?
I installed the new Firmware, doesn’t seem to be any different mind (still drifts in the breeze) . Although I suppose it’s more for the up coming GPS module which will be interesting
 

Bartman

Welcome to MultiRotorForums.com!!
maybe realignment of the ahrs isn't the correct terminology. i've got to reinstall the firmware and initialize it again with it perfectly level. i'm going over everything so when I strap on the gopro i know it's as good as it gets.
bart
 

brendonvz

Member

Attachments

  • IMG_0392.jpg
    IMG_0392.jpg
    141.7 KB · Views: 408
  • IMG_0390.jpg
    IMG_0390.jpg
    148.5 KB · Views: 357
  • IMG_0393.jpg
    IMG_0393.jpg
    141.8 KB · Views: 344
  • IMG_0391.jpg
    IMG_0391.jpg
    143.4 KB · Views: 369

Bartman

Welcome to MultiRotorForums.com!!
Parts arrived yesterday so the rebuild will start tonight including the gopro and video tx.

will post pics as it goes.

bart
 

brendonvz

Member
Nice one, good luck with that.
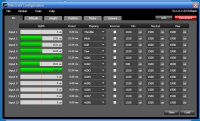
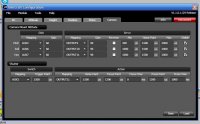
I have a question: Can someone please send me the default AUX1 AUX5 settings for the FC1212-S as well as the INPUT-OUTPUT settings for the RC tab and the Camera tab ... I knida played around with them (and didn’t note the defaults) and now when I'm in hover mode the thing wont hover it just keeps going in one direction and need me to compensate for it as opposed to righting itself ... not good


Bartman

Welcome to MultiRotorForums.com!!
good morning world! waking up on the East coast it's foggy and about 13 degrees C (55 F) but a great day nonetheless.
@ Brendon, i've changed the camera pitch settings somewhat but everything else is still original.

i've got to pick up screws today over at microfasteners.com (15 minutes from my house) and i'll be back in business. i got the gopro mounted last night and the video tx. i just have to wire everything together later tonight and then get the fc/ahrs all squared away.
i may have a go with the stock props again for comparison with the Graupner 11" ones I've been using.
bart
 

Attachments

  • 20apr2011 rc tab x650.JPG
    20apr2011 rc tab x650.JPG
    71.3 KB · Views: 371
  • 20apr2011 camera tab x650.JPG
    20apr2011 camera tab x650.JPG
    54.6 KB · Views: 304

brendonvz

Member
Thank you so much fot that .. .See I was trying to match up the OUTPUT as well as the AUX number?? I'll try it like you have it. I've decided to turn all my servos down to 50% the next time its out.. its way to skittish... and even the Carbon Fibre arm broke yesterday
Literally from about 5 feet in the air , bounced over and snap .. its the most flimsy thing in the world ... I'm going to make my own arms soon, I think a silly point is that they take a thin walled tube and then machine it down right on the pivot point ... who decided that would be a good idea .. I know (the bloke in the spares department)
 

Bartman

Welcome to MultiRotorForums.com!!
just came up from the basement to make a phone call and thought I'd post where I'm at.
first though, brendon, i don't know what the two holes in the top of the dome are. maybe an olfactory inlet of some sort? :)

so, step one of my current rebuild is to tighten up the frame and remove the flex in the arms. i ordered a second top frame plate and just installed it. i had considered using epoxy to laminate it to the original frame plate but there are twenty screws so i don't think epoxy would do much more for it. anyway, with all twenty screws back in and the second top frame plate in place i can honestly say that the arms are virtually flexless. sure, if you grab it hard enough you can make it move but i'd guess it's well outside flight conditions to get it to that point. i'm not so sure it wasn't flexing with the single top plate but since frame flex interferes with the flight control's efforts i thought i'd address it. it's much better now. i had to buy 20 2x8M screws since the original screws were only 5mm long and the doubled frame plate is roughly 3mm thick.

next up i have to run power to my video tx and wire the gopro to the tx. i was told by the folks at Iftron Tech that I can put straight 4S power into the Stinger Pro and it will self regulate the voltage. they actually thought using an external regulator would make electrical noise and the tx wouldn't perform as well. this is not an area where i can argue with people so i'm putting 4S power from the deans plug right into the Tx.

that's it for now. i really can't wait to fly it to see if the frame made any difference. i can't imagine it wouldn't.

bart
 

Bartman

Welcome to MultiRotorForums.com!!
I had to replace a motor since my last crash/maneuver caused a lock ring to pop off and the magnets to break loose. In changing out the motor I also checked my motor mounts with a straight edge along the bottom and two were still bent from the crash before the last crash so I straightened them out.
I may have mentioned this in the build thread but if you look into the hole for the set screw on the motor bell you'll see there isn't a relief cut into the motor shaft for the set screw. I've modified my motors with a notch in the motor shaft to give the set screw a place to lock into the shaft. I use a small round file with a pointy tip to make the notch round and as small in diameter as possible. Just enough for the set screw to dig into the motor shaft and hold it in place.
With the motor apart tonight I also put the bell on a prop balancer just to see if it was even close to being balanced. I'm happy to report that it was actually very close to being balanced and it only took a small piece of clear tape to balance it. I'm going to trust the other three motors are as close to being balanced as the new one was and not make an effort to balance them.
The motors are all back on, the wires are back in place, and the props are going to be back on as soon as I'm done typing. I may just fly it tomorrow and see how it is before trying to calibrate the AHRSs again. I'll have the GoPro on there so maybe there'll be a video but it seems like every time I let the video run something crazy happens.
I'm hoping my work today to get everything assembled as straight and tight as possible will make an improvement in how it flies even before I try to tweak the software.
I guess I'll find out tomorrow.
Bart
 

Bartman

Welcome to MultiRotorForums.com!!
i've set aside today to get my X650 dialed in as i'm hoping to have it with me on saturday to contribute to a local videographer's recording of an outdoor swim event. he likes the peculiar qualities of the gopro on the X650 so he's asked me to be there on saturday.
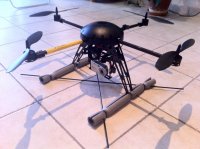
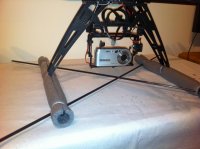
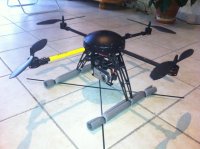
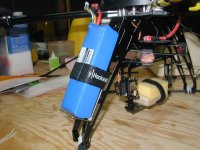
with that in mind i'm trying to improve the stability and handling of my x650 quad. my gut feeling is that the motors are too high kv and the props are too lightly loaded so it's very sensitive and will blast off in an unintended direction if things get out of control. to fix this i've strapped a 3600 mah 4s battery to each gear leg and have gone back to the 11" props. I flew it a few times with the stock props again just to convince myself it wasn't my shortage of experience that was making it a handful (I've been flying a lot lately) and i'm again convinced that it needs to be tamed a bit. i run the risk of burning up something (ESC's, motors, bearings, etc.) with the extra weight but i can't really use it in the stock configuration with my 4S batteries.
i flew it once with the dual batteries and it did handle much better so i'll keep going in that direction. the motor bells weren't hot although putting the tip of my finger on the very bottom of the motor shaft revealed a bit of warmth but i've never done that before so maybe it's nothing new from the weight.
i'll post video later today if I can but it looks like it's an improvement so far. i also have to modify the gear to get the skids out of the gopro's view so i'm off to do that now as well.
bart
 

Bartman

Welcome to MultiRotorForums.com!!
i forgot to mention that with the extra top frame plate and the extra weight, the wobble has definitely been reduced. if i have any time at the end of the day i intend to play with PID settings but that'll be the last thing i do.
 

Bartman

Welcome to MultiRotorForums.com!!
well, after another ten minute flight I'd say it definitely flies better. i don't if i'm frying the esc's with the weight but maybe it's not as heavy as i think. i should buy a little scale and weigh it but the gopro weighs practically nothing so i think it's going to be fine.

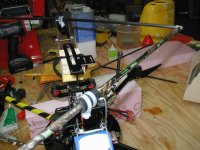
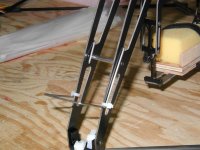
i've attached a few pics of what i was able to get done today. the gear still shows up in the gopro video so maybe i'll trim it a little or move the camera forward a bit.

after ten minutes of flight with two 3600 mah 4S packs, the batteries showed 52% remaining so i'll keep working on longer flights and see where it maxes out. it's 85 degrees F outside so it's doing pretty good with both packs on there.

the little brackets for the batteries to sit on were bent out of 1/16" steel. it's actually welding rod so it's pretty soft but it's enough and it's light.

that's it. i've got to work on my flying but things have been improved today so that's good.
 

Attachments

  • P1010326.jpg
    P1010326.jpg
    140.3 KB · Views: 377
  • p1010324.jpg
    p1010324.jpg
    138.9 KB · Views: 381
  • P1010325.jpg
    P1010325.jpg
    139.4 KB · Views: 406
  • P1010327.jpg
    P1010327.jpg
    142 KB · Views: 368

Top