So I replaced the Bic Pens (yesterdays post...which gave me the idea for these) with some rugged aluminum landing gear. I purchased all the parts at Lowe's for just under $20 (including the miniature pipe cutter) and completed the build and install in about 40 min.
Parts:
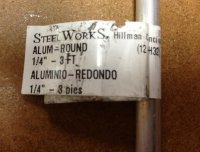
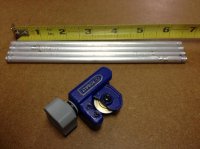
-1/4" x 3' solid aluminum rod: $3.21
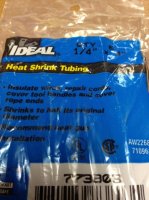
-2 packs 1/4" heat shrink tubing: $3.92
-1/8-5/8" mini tube cutter: $6.95
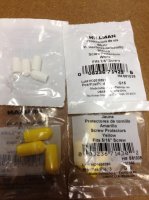
-2 packs (4 count each pack -white) 1/4" tube end protectors: $1.74
-2 packs (three count each pack - yellow) 5/16" tube end protectors: $1.74
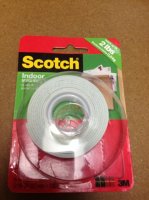
I had the two way tape and small black zip ties, but you'll need these as well.
The build:
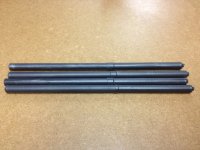
-With the pipe cutter, I cut four sections of the aluminum rod at 6-1/2"
-Wrapped with heat shrink.
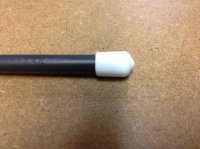
-Placed white end protectors on both ends of all 4 rods.
-Placed yellow end protectors over the white protectors on one side of rods for extra wear, as this side will be contacting the ground.
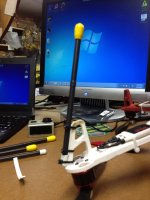
-Cut small strips of two way tape and apply to the outside of the NAZA's skids.
-Zip tied new landing gear to skids.
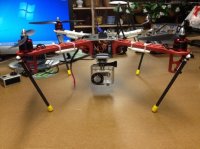
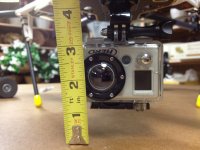
With the GoPro mounted in it's protective case beneath (centered) the NAZA, this set up allows for one inch of ground clearance. The landing gear is at no time in the frame of the camera at the r5 setting. Very light weight, very strong...they don't budge.
Just wanted to share a cheap easy build...just a bit more expensive than the Bic Pens! :livid:
View attachment 8811View attachment 8812View attachment 8813View attachment 8814View attachment 8815View attachment 8816View attachment 8817View attachment 8818View attachment 8819View attachment 8820View attachment 8821
Parts:
-1/4" x 3' solid aluminum rod: $3.21
-2 packs 1/4" heat shrink tubing: $3.92
-1/8-5/8" mini tube cutter: $6.95
-2 packs (4 count each pack -white) 1/4" tube end protectors: $1.74
-2 packs (three count each pack - yellow) 5/16" tube end protectors: $1.74
I had the two way tape and small black zip ties, but you'll need these as well.
The build:
-With the pipe cutter, I cut four sections of the aluminum rod at 6-1/2"
-Wrapped with heat shrink.
-Placed white end protectors on both ends of all 4 rods.
-Placed yellow end protectors over the white protectors on one side of rods for extra wear, as this side will be contacting the ground.
-Cut small strips of two way tape and apply to the outside of the NAZA's skids.
-Zip tied new landing gear to skids.
With the GoPro mounted in it's protective case beneath (centered) the NAZA, this set up allows for one inch of ground clearance. The landing gear is at no time in the frame of the camera at the r5 setting. Very light weight, very strong...they don't budge.
Just wanted to share a cheap easy build...just a bit more expensive than the Bic Pens! :livid:
View attachment 8811View attachment 8812View attachment 8813View attachment 8814View attachment 8815View attachment 8816View attachment 8817View attachment 8818View attachment 8819View attachment 8820View attachment 8821
Attachments
-
 01.jpg56.3 KB · Views: 754
 -
 02.jpg60.5 KB · Views: 428
 -
 03.jpg69.2 KB · Views: 411
 -
 04.jpg60.4 KB · Views: 382
 -
 05.jpg57.4 KB · Views: 664
 -
 06.JPG142.8 KB · Views: 374
 -
 07.jpg57.4 KB · Views: 390
 -
 08.JPG139.4 KB · Views: 406
 -
 09.jpg60.7 KB · Views: 449
 -
 10.JPG144.9 KB · Views: 408
 -
 11.jpg75.3 KB · Views: 435

")