CarbonCore
Member
View attachment 7946
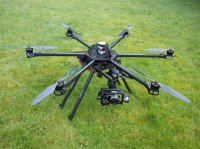
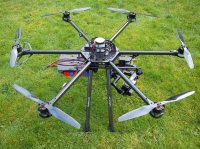
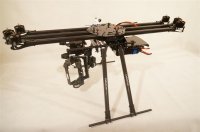
As more RC flyers and aerial photographers are getting started in Multicopters, and some are converting to CarbonCore, I’m doing this photographic build thread to talk through how I would personnel build a Hexacopter.
Setup:
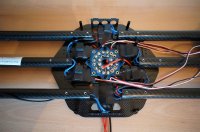
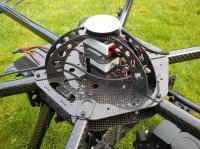
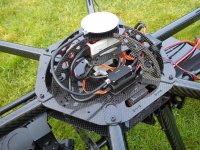
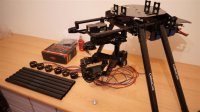
CarbonCore Hexa 950
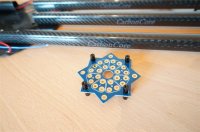
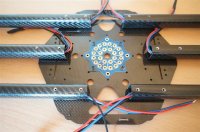
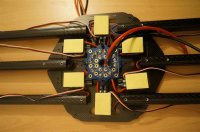
Zenmuse Z15 with Sony Nex-5 and DJI WooKong-M
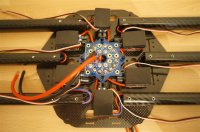
4112 DJI Motors
2x 6S 5000mAh LiPo batteries (lightweight and high power rechargeable for those who don’t know)
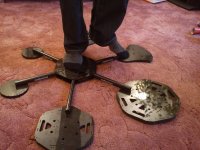
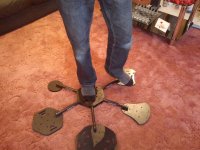
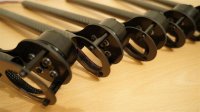
New, tall and light weight leg set, available in the New Year.
The new leg set can also be used with the PhotoHigher AV130 and AV200.
The leg set also detaches from the Multicopter with only four clips. (Production version).
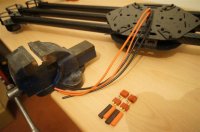
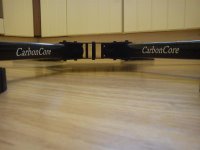
The latest motor arms now have carbon inserts pressed around the captive nuts, that all come pre fitted.
So here we go!
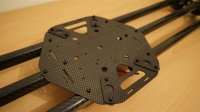
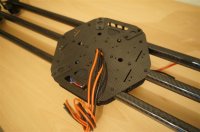
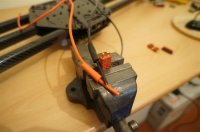
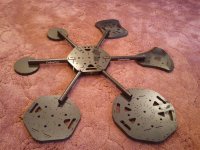
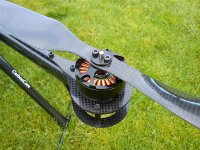
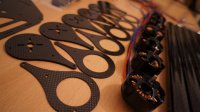
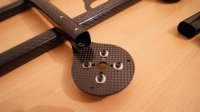
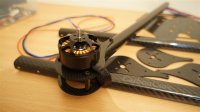
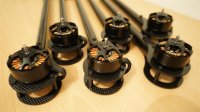
The very first thing I did was to bolt, with thread lock, the six motor mounts (3.0mm thick) to the TOP of the motor arms.
Then drop four 6mm long bolts, with washers, through the slots.
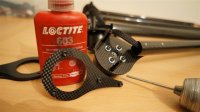
Next adding a dot of thread lock to the threads in the motors.
Finally fitting the motors to the motor mounts.
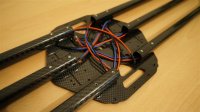
I also used some cable braid as the three motor cables have to go around the edge of the motor mounts.
View attachment 7947View attachment 7948View attachment 7949
As more RC flyers and aerial photographers are getting started in Multicopters, and some are converting to CarbonCore, I’m doing this photographic build thread to talk through how I would personnel build a Hexacopter.
Setup:
CarbonCore Hexa 950
Zenmuse Z15 with Sony Nex-5 and DJI WooKong-M
4112 DJI Motors
2x 6S 5000mAh LiPo batteries (lightweight and high power rechargeable for those who don’t know)
New, tall and light weight leg set, available in the New Year.
The new leg set can also be used with the PhotoHigher AV130 and AV200.
The leg set also detaches from the Multicopter with only four clips. (Production version).
The latest motor arms now have carbon inserts pressed around the captive nuts, that all come pre fitted.
So here we go!
The very first thing I did was to bolt, with thread lock, the six motor mounts (3.0mm thick) to the TOP of the motor arms.
Then drop four 6mm long bolts, with washers, through the slots.
Next adding a dot of thread lock to the threads in the motors.
Finally fitting the motors to the motor mounts.
I also used some cable braid as the three motor cables have to go around the edge of the motor mounts.
View attachment 7947View attachment 7948View attachment 7949
")