Group Build 2014, DJI NAZA/F450 Quadcopter!

JoeBob

Elevation via Flatulation
Joining the party late:
View attachment 15562
Being totally new, this scares the bejeezus outta me!

Tales of copters flying over the horizon - Yikes.

Ordered the 550 with NAZA v2 and ZenMuse from HeliPal (Only place that had it in stock). Ordered late Sunday night. It got here Wednesday from Hong Kong.

Going back to watch the videos again.
Tomorrow, I'll open an ESC...
 

Attachments

  • 550 Parts Small.jpg
    550 Parts Small.jpg
    31.6 KB · Views: 312
  • 550 Parts.jpg
    550 Parts.jpg
    140.8 KB · Views: 238
Last edited by a moderator:

I changed out the DJI Motors for T-motors (2216 900kv) and took it for a fly.
http://www.youtube.com/watch?v=oIKdbz7nUKQ
Well after the little oops the other day I have been working on some weight saving measures and trimmed excess wire off motors and other places. Every little gram helps.
Today I took it out to a CLEAR area (Soccer Pitch) and did some tests with props.
The results are in and here they are.
Flight 1
Prop 10x4.5
Time 10:14
Mah used 3797 (Out of an available 4000mah which is 80% of 5000mah S4)
Motor temp warm to touch but not hot
Battery Pack 2
AUW=2086g


Flight 2
Prop 9x5
Time 9:25
Mah used 3727 (Same type of battery)
Motor temp cool
Battery Pack 1
AUW 2077g

So it looks like it will be 10x4.5 for me. I will keep the others as spare in case of another oops:nevreness:
Regards
Crispy


jbrumberg

Member
Congratulations. Pretty amazing. I am glad that you got it back. Too bad about the lens cap. That's something I would have done as well.
 

coreyperez

Member
All,

Well I just wanted to share that I finally got a MR up and flying! Granted, it was a little “Cheating”, but I got a RTF version.

Now hear me out before I get kicked off this thread!


Since I know I’ve got a long wait ahead of me for parts, I opted to get a Lady Bird from Amazon (10ish days ago) and it just finally got here. I can say that this is a lot more work than I had anticipated! I’m sure the two will fly differently, BUT… I’m using this lady bird as my stepping stone. I’d say with the 7-10 batteries I’ve ran through it so far I’ve learned a LOT in the mannerisms of these vehicles. It’s also shown me how technical it is to fly them fully manual. I can honestly say that I don’t (yet) have the skill-set to fly them with yaw-induced to make coordinated turns and such. I’m quite good at hovering and getting it back to a hover. I feel confident enough to fly it in my little 1 bedroom barracks. It’s been a fun learning curve, and I’ve even considered getting another with some additional batteries for those cold and windy days here in Korea!

I can say this thing takes a beating and keeps on going. I’m pretty impressed and would highly recommend this technique to anybody getting into the hobby. It’s pretty eye-opening and I truly cannot believe that this would form any bad habits, just strengthen a skill-set which would be required for the full-size MRs.

Well, it’s been a slow weekend on the forum, so I thought I’d post a quick blurb about my little Lady Bird and the training time I’ve put in this weekend.
On a more thread-specific topic, my wife (in Alaska) has finally received my last box from Hobby King, now I just need her to find the motivation to send it to me (which she was supposed to do immediately upon receipt!).

Well, that box and a charger and things that are currently already on the way and I’ll have my 550 done! With that being said…. I’m already looking at my next TWO builds… Yes, next TWO! I’m really wanting a Tarot (Absolutely BEAUTIFUL!) with the XAircraft, and I’m wanting to work in a Team Black Sheep quad as well. I’ll probably do a multi-wii type FC, something more “budget” with that one. Time will tell.

This hobby may truly be the death of a happy marriage!

Corey
 

jbrumberg

Member
"This hobby may truly be the death of a happy marriage!"- Corey, 2014

"For better, or worse,"- sometime before 2014 everyone agreed to that. We have only been married 9 years, but we have been together 37+ (sometimes things need to be addressed in a slow and careful manner, not like RC stuff). I can assure you in all honesty that I have not "improved" (in wifey's eyes) in my thoughts, behaviors, or toys. According to wifey I am worse, but that's a matter of perception.

"
Lady Bird"- Is that the frowning sad beetle? Awesome good choice. " It’s been a fun learning curve, and I’ve even considered getting another with some additional batteries for those cold and windy days here in Korea!" I said that abut my 1st SYMA X1, now I have 4 operational with different set ups and more batteries and size batteries and replacement parts than I can almost count or keep inventory. I bet you end up with (at least) 3 Lady Birds and at least 8 extra batteries in the end. There are reasons behind my predictions.

Anyways good luck with your "little lady/ladies" and practice, practice, practice, and repeat....

Thanks for everything.

Jay
 

sledge57

Member
It's cool you're finally flying Corey. I managed to get 4 flights out of my 550 after I completed it before the Ice Age set in here.

So in desperation, I, like you, went out (yesterday) to my LHS and bought a Heli-Max 1Si and much to my dogs displeasure, (they hate vacuums and lawn mowers too), I have been having fun flying and learning in my basement.

I wish the extra batteries were more available, I have 2 more ordered but have to wait 2 weeks to get them.

Keep flying and have fun building when all your goodies arrive.
 

Bartman

Welcome to MultiRotorForums.com!!
Video #5 is up

Hi everyone,

Video number 5 is up and will be live in about thirty minutes. It's a quick review on modifying the wires of your non-stock motors to fit your F450 or F550.


Thanks!
Bart
 
Last edited by a moderator:

Another option for shorting the wire is to de-solder the bullet connectors and then re-solder them. This is what I did with my T-Motors. I removed 41g of wire on my 4 motors.
Regards
Crispy
 

Bartman

Welcome to MultiRotorForums.com!!
Another option for shorting the wire is to de-solder the bullet connectors and then re-solder them. This is what I did with my T-Motors. I removed 41g of wire on my 4 motors.
Regards
Crispy

Crispy,

That's absolutely right, the bullet connectors can be remove and reused. :)

Bart
 

COMike93yj

Still Building!
Bart,

Quick questions on POWER!!!!

There is a TON of information out there on "C" ratings of batteries.....can you let us know a few "pointers" on what to be looking for with regards to "C" ratings for the batts we choose for our Quad Build?

I would hate to have anyone purchase a battery that would simply not work for the Quad Build that wasn't suited for our uses (future FPV, camera, accessories). I have a rudimentary grasp and have some 30C batts on order but (3s 4000mAh 30c's ) coming in a week or so but I think I missed the boat on the "C" lesson in my research and am now rethinking my decision.

Mike :)
 

Bartman

Welcome to MultiRotorForums.com!!
Bart,

Quick questions on POWER!!!!

There is a TON of information out there on "C" ratings of batteries.....can you let us know a few "pointers" on what to be looking for with regards to "C" ratings for the batts we choose for our Quad Build?

I would hate to have anyone purchase a battery that would simply not work for the Quad Build that wasn't suited for our uses (future FPV, camera, accessories). I have a rudimentary grasp and have some 30C batts on order but (3s 4000mAh 30c's ) coming in a week or so but I think I missed the boat on the "C" lesson in my research and am now rethinking my decision.

Mike :)

Mike,
I can try to address that tonight when I'm back home and have some time.

Bart
 

COMike93yj

Still Building!
Thanks Bart!!!!

That would be VERY helpful!!!!

Appreciate you taking the time to help us all out on this!

Cheers,

Mike :)
 

Bartman

Welcome to MultiRotorForums.com!!
Mike,

Max amps that a battery can sustain is represented by the discharge C rating. Don't confuse it for the charging C rating.

For your 30C batteries the max discharge current will be 30 times the Capacity of the pack. So, if it's a 5000mah battery pack its capacity will be 5000 milliamps for an hour or 5 amps for one hour.

Using the 5 amps value you can calculate max amps by doing the math, 30*5 or 150 amps.

If you're building a quad then you can give 150/4 to each motor as the max amps each motor can draw. Since this is a maximum value you'd want to design to hover at about half of it.

150/4=37.5 amps per motor

37.5 amps / 2 = 18.75 amps at about mid throttle per motor.

Next you have to look at what it is you're trying to do with your helicopter and what the total weight will be when you're all loaded and ready to fly. If you can find a motor that can provide 1/4 of the total lift you'll need and do it at the current (amps) level that you calculated then you'll be in the ballpark of having the right battery.

I tend to go backwards with a new design.....I try to ballpark the total weight the heli will be by assigning weight estimates for every individual component I can identify and then choose a motor and prop combination to provide the lift I"ll need. With a rough idea of what battery I'll use I try to use manufacturer data to estimate current draw and flight times. If I have to I put different motor/prop combinations onto my test stand and run them with a monitor to measure actual voltage and current levels at different power levels using a digital scale to measure actual thrust.

It's a little confusing but doing it on paper once or twice helps it to make sense. The numbers are different for a dual battery set-up.

Hope that helps.
Bart
 
Last edited by a moderator:

Bartman

Welcome to MultiRotorForums.com!!
keep in mind that a multi-rotor helicopter can hover at much higher current levels on very hot or very humid days. one heli i have can't really fly when it's hotter than about 93 degrees as it causes the flight controller to brown out if i try to use my regular camera.
 

COMike93yj

Still Building!
Thanks Bart!

I gathered as much but wanted you to chime in on this! Your synopsis makes sense but I have a question.....

The Propeller has a TON to do with the "draw" on the entire "current system"......something that folk's don't readily appreciate and I am JUST beginning to comprehend that. WHY WAS I ASLEEP IN EE CLASSES!!!!

There is ANOTHER factor that also plays into account as well as I am learning and that is the ESC (Different subject but still on topic).

I agree with you and use eCalc for my computations and ALSO look at what folks are using for successful builds but I still have reservations on the whole "C" rating on batts....NOT the "C" rating for charging but the "C" rating overall.

From what I understand if a battery that has a 25 -35 C rating means that it can UNDER NOMINAL conditions provide 25C (25 times the mAh) to whatever source needs to draw from it. If the same battery NEEDS to gather some more "OOMPH" it can go up to the 35C rating (35 times the mAh) but it is not ideal.

Did that make sense or am I missing something?

I have also found that the "C" rating is kind of a nebulous thing when it comes to different manufacturers from my calls to folks.


Back on TOPIC for our Group Build....


What would you recommend for our needs (with the "secret" camera stuff you mentioned earlier ;) )

Mike :)

PS....I have to be aware of these things as I fly at 8000' MSL for my house and the majority of MY flying will be at 10,000 to 12,000' MSL.......yeah not ideal but the price I pay for living in the Rockies :)
 

Bartman

Welcome to MultiRotorForums.com!!
Video 6 is up!

Video 6 has been posted. It's a short one just clarifying a few details before we go ahead and close up the frame and get ready to configure the NAZA flight controller.

 
Last edited by a moderator:

JoeBob

Elevation via Flatulation
As you noted in the video, mounting the Zenmuse is not provided for. I got a bald spot from scratching my head trying to figure out how to attach the gimbal onto the bottom of my 550.

So I've ordered some square carbon fiber tubes and strips to epoxy together a mount for my gimbal and landing gear. http://ctrl.me/F450-Al-Landing-Gear

I plan to locate the camera forward and have a shelf out back for battery and video downlink Tx.
 

Bartman

Welcome to MultiRotorForums.com!!
As you noted in the video, mounting the Zenmuse is not provided for. I got a bald spot from scratching my head trying to figure out how to attach the gimbal onto the bottom of my 550.

So I've ordered some square carbon fiber tubes and strips to epoxy together a mount for my gimbal and landing gear. http://ctrl.me/F450-Al-Landing-Gear

I plan to locate the camera forward and have a shelf out back for battery and video downlink Tx.

joebob,

i thought about drilling holes through the lower frame plate but there is a risk that the copper will lift off the underlying material and ruin the frame plate. I suppose you could sandwich the frame plate between two pieces of plywood and clamp it to a drill press table and drill it that way but you'd need to use a high speed. also the holes would have to be deburred after drilling so no burrs could short out between the two plates. plastic hardware would be strong enough to hold the camera mount to the frame plate but you'd have to do it correctly each step of the way to avoid messing up the pieces. if you drill holes in the lower frame plate you could use plastic standoffs to get the mounting plates off the bottom surface by 1/4" or so. i think it would be better than using additional adapter pieces which would just add weight.

bart
 

Bartman

Welcome to MultiRotorForums.com!!
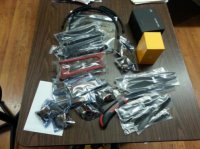
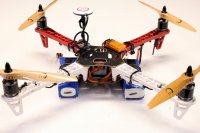
I was in the shop this afternoon and I couldn't help but put the props on, a couple of batteries, and fire it up. It's alive! It's ready to fly at this point but I'm going to go through the manual, review each step and make sure I've done everything that needs to be done. With the GPS mounted there is a compass calibration that has to be done and probably one or two other things before it can be flown. Here are a couple of photos and then we're going to hunker down for a review of the manual.

1-IMG_1558.JPG

2-IMG_1559.JPG


I'm going to be letting the batteries act as my landing gear with the FPV camera up on top of the frame along with the video transmitter which will both be added after it flies.

Looking at the DJI NAZA Manual, page 3 kicks things off by saying that DJI isn't responsible for what you do with the product you've bought and are about to take airborne. You can't really blame them as it does represent a certain amount of risk. To that end, understand that you can hurt someone by flying your new helicopter so you've got to be careful and methodical as you learn to fly it and in the future as you attempt to expand your operating envelope. If at any time you aren't sure what is happening or why it's doing something odd, stop and ask for help. It's that easy and there are plenty of people here and elsewhere that would rather help you than see you crash.

If at this point you still have questions about the different parts or how they're hooked up to each other, those questions can be answered on pages 5 and 6.

Page 7 is important because it explains the correct sequence to connect the NAZA to the computer. Remember, there's a radio (Tx), a flight control system, a USB connection, and a laptop with proprietary software which all need to be powered up and hooked up in the correct sequence to make the connection function. Basically the sequence is to first power up your laptop, then the Radio transmitter, then the helicopter flight battery (REMOVE YOUR PROPS FIRST OR A CERTAIN MODERATOR WILL VISIT YOU AT YOUR HOME TO DELIVER A STERN WARNING! AND NO HE WON'T BRING BEER), attach the NAZA to the computer with the USB cable, and then open up the NAZA Assistant software. The NAZA Assistant should connect to the NAZA flight control system and display whatever setting have already been established. If the firmware is old of if the firmware in in conflict with the versin of the Assistant that you are running then you will immediately get a message. The first time you do all of this the Assistant will attempt to register your NAZA system along with the serial number and some basic account information for you.

Page 8 shows some recommended starting settings for your gains. Gains are settings that dictate how well the helicopter flies and by being able to set these gains for our individual helicopters we have more freedom to customize our aircraft.

Page 9 discusses Control Mode Knowledge and I commend DJI for taking the time to dream up this detailed bit of information but if I were looking at it for the first time as a new owner/pilot I'd be confused. It's basically trying to explain what features are available in what modes.
  • Manual mode means that if you roll or pitch the helicopter and then center the stick, the helicopter won't necessarily return to a level flight condition by itself and it may go sailing of into a tree or building if you don't make an effort to control the aircraft's attitude manually. You're on your own with manual mode and things can get out of control in a hurry so don't be too heavy thumbed on the controls. Use small inputs to get a feel for response and control.
  • In ATTI mode the various sensors in the flight controller are assisting you by returning the helicopter to a level condition when you center the sticks on the transmitter. It can still go sailing off into a tree but it likely won't happen as quickly or with the same complete loss of control that can happen in Manual mode. Some other flight control systems call this type of assisted mode, Auto-level which is a more intuitive term as the helicopter is literally leveling itself automatically when you release the sticks.
  • GPS ATTI mode uses the GPS receiver to hold the helicopter in one spot over the ground. While in this mode you can move the sticks and the helicopter will respond but when you let go the heli will attempt to take up residence right where you left it and it will stay there until the batteries die

At the bottom of page 8 and into pages 9 and 10 are the motor stop and start directions. Various flight controllers use a variety of tricks to get the motors spinning, most of these tricks are in the name of safety as it is easy to bump the sticks inadvertently while futzing around before a flight. By making it necessary to do some combination of stick inputs to "arm" the motors they have reduced the possibility of the motors spinning up unexpectedly which could hut someone.

Skip page 11 if you don't have the GPS module. If you do have the GPS module then you need to follow these instructions to calibrate the compass sensors. Follow the directions very closely as this step will contribute to how well your heli flies and does its thing with the different features.

Read page 14 before proceeding through pages 12 and 13 and certainly before your first flights.

In pages 12 and 13 DJI is beginning to get a little nervous that you might have actually made it that far and will possibly fly your new multi-rotor helicopter. They ask you to double check some basic things that can ruin your first flight so I'd say it's worth reviewing their list of items and make sure you're in compliance with them. When you first power up the helicopter, try to keep it as perfectly still as possible as the sensors will be initializing themselves. Follow the directions here and you should be good to go!

Page 15 is important because DJI is trying to explain how the built in Fail-Safe feature works and what it will do when activated. If you know what it will do then you have a better chance of not panicking should it ever happen to you. I'd recommend reading this page even if it doesn't make much sense at first. It will begin to make sense if you keep going back to it and keep trying to soak up what they're laying down. :)

Regarding page 16, the general consensus amongst DJI users (IMHO) is that their flavor of low voltage protection isn't as awesome as the guy that designed it probably thinks it is. You may try it, you may not, it's a personal decision. Read up on it, ask some questions around the interweb and see for yourself if you think it has value.

Pages 17, 18, and 19 describe advanced flight control modes. These pages are fairly self explanatory but we're here if you have any questions.

On page 20 they discuss the Receiver Advanced Protection function. I'm not entirely familiar with this and in reading it I'm just more confused. We can discuss this in the NAZA sub-forum...
http://www.multirotorforums.com/sho...anced-Protection-function&p=142409#post142409

The next page that really jumps out at me is page 23 as it explains the various LED color and flashing pattern combinations. IT'S A GREAT IDEA TO PRINT THIS OUT IN COLOR AND STUFF IT IN YOUR BACK POCKET WHEN YOU GO FLYING. You should have built your heli so you could see the NAZA's LED when it's flying. These flashing patterns are confusing because there are so many possibilities and when you're out at the flying field or your local park it's nice to have page 23 available if things don't look quite right.

That's it for now. I'll continue in another post in the morning!

Thanks for reading,
Bart
 

Attachments

  • 2-IMG_1559.JPG
    2-IMG_1559.JPG
    120.3 KB · Views: 210
Last edited by a moderator:

Top