Product Review ** FLYPRO X600 w/DEVO 7 Hexacopter for FPV Aerial Photography RTF

SleepyC

www.AirHeadMedia.com
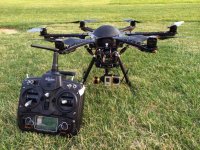
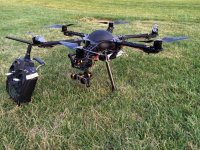
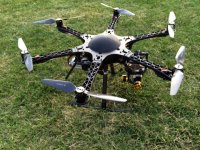
FLYPRO X600 with DEVO 7 Hexacopter for FPV Aerial Photography RTF 2.4GHz


Introduction:
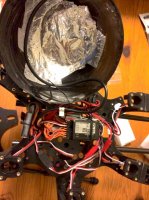
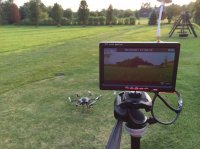
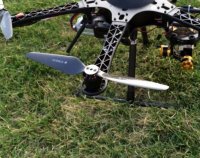
A while back I was offered the chance to review this smaller Hexacopter. I really did not have a back up "GoPro" sized rig so I jumped at the chance. The FlyPRO x600 is based off a very familiar 550 size rig most have seen many times, but also has several design changes and enhancements that make it unique. This package I received was the RTF FPV version, meaning it came with a Devo 7 radio, a 1000W Video tx, video Receiver, a 7" monitor and pretty much everything to get this rig flying. The only thing I needed to add was a GoPro.

Unboxing:
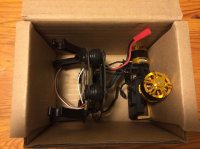
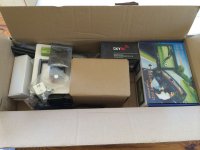
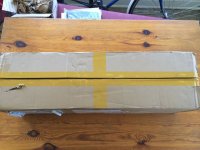
Ok let's take a look at whats inside the box!

FLYPRO X600 Includes:
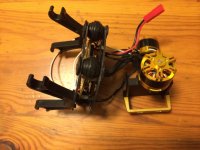
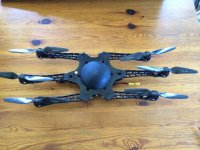
1 * FLYPRO X600 Frame (NAZA lite+GPS,Shock Absorber Landing Gear )
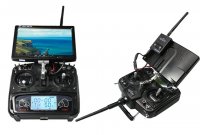
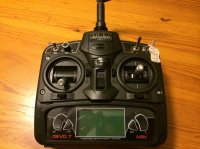
1 * Walkera DEVO 7 Remote Control (only inculdes one receiver)
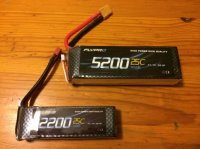
1 * 5200MAH 11.1V Battery for Drone X600
1 * 2-axis Camera Gimbal
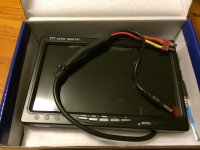
1 * 7 Inch Monitor
1 * Monitor Stand
1 * 7inch Monitor Cover
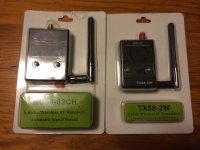
1 * FPV AV Wireless equipment
1 * Batter Rack
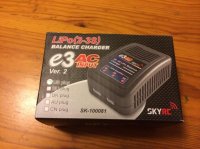
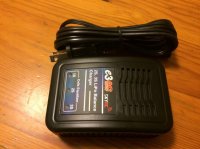
1 * SKYRC e3 Charger

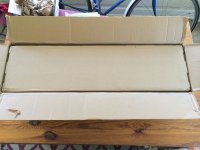
Everything is double boxed and packaged well.
attachment.php
attachment.php
attachment.php
attachment.php


Most of the support equipment can be found in a separate box.

attachment.php
attachment.php
attachment.php
attachment.php
attachment.php


The kit is very complete, pretty much everything you ned is included!
attachment.php
attachment.php


The Devo 7 Radio is a very capable radio and has more than enough functions to run the FLYPRO 600.
attachment.php


The VTX and RX seem to be robust and have plenty of power!
attachment.php
 

Attachments

  • 5.jpg
    5.jpg
    74 KB · Views: 430
  • 1.jpg
    1.jpg
    89.8 KB · Views: 389
  • 1 half.jpg
    1 half.jpg
    78.9 KB · Views: 383
  • 3.jpg
    3.jpg
    81.8 KB · Views: 376
  • 4.jpg
    4.jpg
    96.8 KB · Views: 401
  • 6.jpg
    6.jpg
    71.2 KB · Views: 426
  • 7.jpg
    7.jpg
    139 KB · Views: 464
  • 8.jpg
    8.jpg
    81.4 KB · Views: 394
  • 9.jpg
    9.jpg
    75.6 KB · Views: 397
  • 10.jpg
    10.jpg
    68.3 KB · Views: 393
  • 11.jpg
    11.jpg
    77.7 KB · Views: 403
  • 12.jpg
    12.jpg
    80.6 KB · Views: 388
  • 13.jpg
    13.jpg
    141.7 KB · Views: 397
Last edited by a moderator:

SleepyC

www.AirHeadMedia.com
The included 2-axis Go-Pro gimbal is pre-tuned and ready to put onto the 600.

attachment.php
attachment.php


FLYPRO X600 Specification:

•Dimension : 590mm x 590mm x 270mm
•Motor to Motor : 300mm
•Flight Controller : DJI NAZA Lite w/ GPS Module (Setup for DEVO 7 transmitter)
•Propeller Size : 9" X 5.5" Carbon Fiber Propeller (Clockwise and Counter Clockwise)
•Motor : 303S 1000KV Brushless Motor
•ESC : 20A with BEC
•Load Weight:500-600g
•Battery :11.1V 5200mah 25C will provide 9~10 minutes of flight time


DEVO 7 Features:


•Quad-bearing design.Improved quad-bearing design of the Radio sticks makes the control silky and smoothly.
•Adopted core technology of DEVO 12,versatile function ,high cost performance .
•2 Model Type: Helicopter and Airplane. Improved programming with more mixes and better interface Program MIX,MIX to Throttle.
•7-point throttle curve makes the control exquisitely.
•Fifteen-model memory.
•Online update funcation:Enjoying update the latest program and copy model data freely and easily.


Assembly:

Although the FLYPRO 600 is considered a RTF rig, there is some assembly needed. Mounting the landing gear and attaching the gimbal is pretty straight forward. An assembly manual is available for download and I suggest you glance at it even if the rig seems easy to assemble. I found a few things that I had assumed to be one way were actually done in a different manner. So use the manual! After I attached the landing gear and the gimbal, I then added the Video Transmitter. One of the nice features of the X600 is that all the wiring has been done for you. Simply plug in the power source wire to the gimbal and another to the video transmitter and both are ready to go. There is also signal wire coming from the receiver that plugs into the gimbal to control the tilt of the gimbal. I added a few zip-tys to make sure everything was secure after plugging it all in.

attachment.php
attachment.php


The radio comes pre-programmed to the flight control. Which upon inspection was indeed a DJI Naza Lite!

(Look closely and you can see the Naza positioned under the Devo's receiver. The GPS puck is taped to the top of the dome.)
attachment.php
 

Attachments

  • 14.jpg
    14.jpg
    137.4 KB · Views: 394
  • 15.jpg
    15.jpg
    132.1 KB · Views: 380
  • IMG_3775.jpg
    IMG_3775.jpg
    135.6 KB · Views: 348
  • IMG_3776.jpg
    IMG_3776.jpg
    141.6 KB · Views: 352
  • naza.jpg
    naza.jpg
    110.9 KB · Views: 366
Last edited by a moderator:

SleepyC

www.AirHeadMedia.com
Flying:
After the assembly is complete pop each of the included 3S battery packs onto the supplied SkyRC E3 charger. The larger 5200mAh pack is the flight battery, and the smaller 2200 pack is for powering the included FPV monitor. Although the included battery charger works, I would suggest getting something that can charge your packs more rapidly as this charger takes quite a while to charge the 5200 mAh flight pack.As I had mentioned earlier, the unit has a legit DJI Naza Lite installed. And I have to say the Naza Lite is a perfect match for this airframe. It's no secret that in the past I had not been a fan of the Naza Lite flight controller, but honestly for this airframe it works perfectly. And pre-programmed gain settings from FlyPro are spot on. The rig flys very smoothly is very maneuverable and yet is very stable. Even in rapid descents the X600 did not have the toilet bowl effect. The Devo 7 radio will not feel amazing if you have a high end radio in your collection, but it certainly gets the job done. The factory sets up the radio to only use two flight modes. Atti and GPS. The X600 flies very nicely in both modes and in GPS the rig will sit wherever you put it. Another nice feature the X600 has pre-installed is LED's. During the day they are not very noticeable, but at night, they are enough that night flying the X600 is truly enjoyable!


The FLYPRO X600 Ready for flight!
attachment.php
attachment.php
attachment.php


The FPV System showing what the GoPro is seeing. The VTX/RX works GREAT!
attachment.php


The monitor was supposed to fit onto the transmitter like it is shown here in this picture.
attachment.php


But the little monitor clip that was included did not fit the Devo 7's strap clip. So I had to use a tripod.
Overall I like using a tripod so tis was really a non-issue. The FPV system works great, but I would like to see some kind of a sun shade included with the monitor.
If the sun is at your back, it becomes very hard to see the FPV screen. For those who are just starting their Aerial Video adventure, the use of a FPV screen is invaluable in framing your shot or even following a subject. And once a pilot gets used to flying while monitoring the shot, the video results will improve greatly.
 

Attachments

  • 10579231_10204379775364762_1820243989_n.jpg
    10579231_10204379775364762_1820243989_n.jpg
    151.4 KB · Views: 391
  • 10609198_10204379774924751_1103725934_n.jpg
    10609198_10204379774924751_1103725934_n.jpg
    153.1 KB · Views: 385
  • 10608895_10204379882127431_2043169741_n.jpg
    10608895_10204379882127431_2043169741_n.jpg
    135.9 KB · Views: 492
  • 10579124_10204379882927451_1183342952_n.jpg
    10579124_10204379882927451_1183342952_n.jpg
    89.9 KB · Views: 466
  • X600_17.jpg
    X600_17.jpg
    61.1 KB · Views: 563
Last edited by a moderator:

SleepyC

www.AirHeadMedia.com
Tips:

There were a few spots on the X600 that I thought could use a little attention. I let Flypro know and they said they would be addressing them. The first was that the props were held on with just flat top screws. This to me put too much stress on the props and could lead to failure. I had some extra Flat prop washers and added them to the top of the props and immediately felt like the propellers were much more secure and had less stress around the bolts.

These are the added flat prop washers I added to help secure the props.
attachment.php


Also do not try to over tighten the arm bolts. I noticed that the arm bolts screw into little metal inserts that are molded into the arms themselves. If there is too much force applied to the bolts I think it would rip the metal insert out of the arm and then it would just twist in place.

When taking off let the flight control do the work. Pop the throttle to 51 - 52% and let the rig come off the ground and get into a hover. If you try and control the rig while it's talking off it's easy to over correct it and cause the rig to flip or roll over.

The gimbal works well, but I did experience some jello on the initial flights. I rebalanced the propellers and I also replaced the included vibration dampening balls with some of a lighter material. This removed the jello almost instantly! SO I would suggest doing this. (Although FlyPro did take my notes so maybe they are doing this on future production models)


Conclusion:
Over all I have to say the FlyPro X600 is a very nice little hexacopter. It's a great step up from the normal RTF quad. The flight time and the stability are great and all the equipment included with this package works! If you are looking for a professional solution to fly your GoPro I'd go as far as saying this could work! A little tweaking, some prop balancing and one can achieve great results with the X600. The price for this rig is very competitive with other RTF GoPro quads, so stand out from the crowd! Go HEX!

For more information or to order a FLYPRO X600 check out www.hobbywow.com


Attachments

  • 10608895_10204379882127431_2043169741_n.jpg
    10608895_10204379882127431_2043169741_n.jpg
    54.6 KB · Views: 411
Last edited by a moderator:


Top